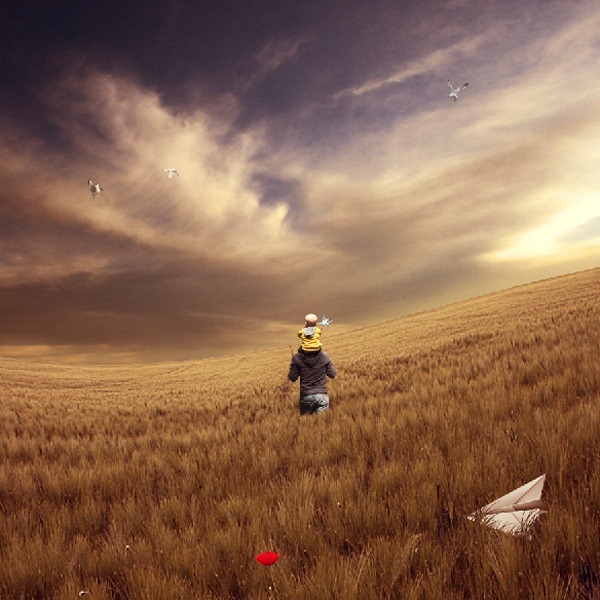
Preview of Final Results

Mystical Father and Son Scene Photoshop Tutorial
Tutorial Resources
- Father and Son I – IQuitCountingStock
- Field – sxc.hu
- Sea bird 99 – EquineStockImages
- Sea bird 29 – EquineStockImages
- Sea bird 100 – EquineStockImages
- desert sunset -night-fate-stock
- soft bokeh – night-fate-stock
- Cape May Lighthouse 8 – Dracoart-Stock
- paper windmill -angeltouch1
- plane – angeltouch1
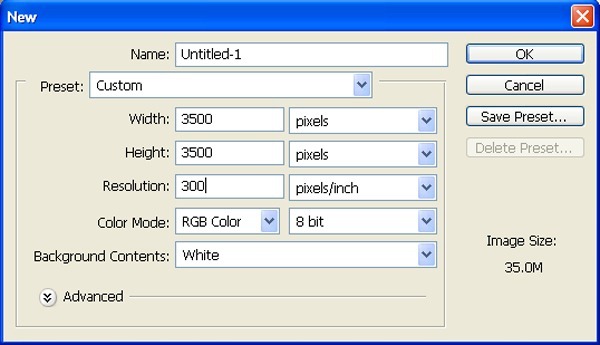
Step 1: Create a New Image File
Create a new file with a width of 3500 px and a height of 3500 px at 300 dpi (Dots per Inch). Background Contents should be White.
Step 2: Create the Background
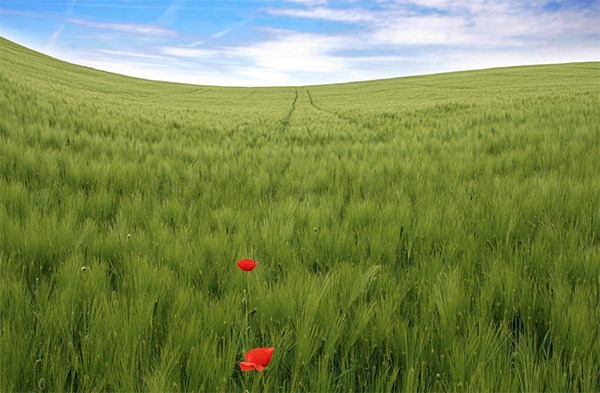
First off, let’s open the field in Photoshop. We will be using field from this stock image so we will need to transfer it to our main canvas.
Step 3
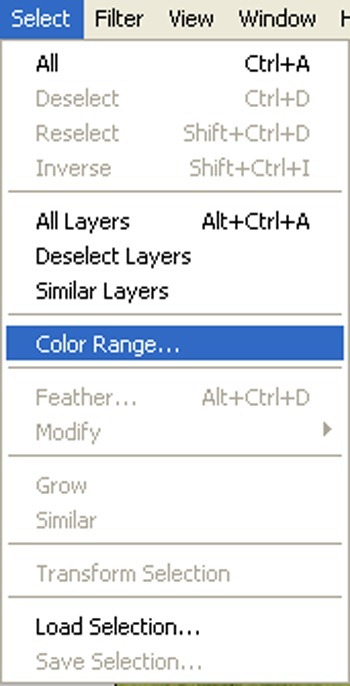
Now, go to select and click color range
Step 4
Next, open color range and pick the color sample from highlighted area as shown below:
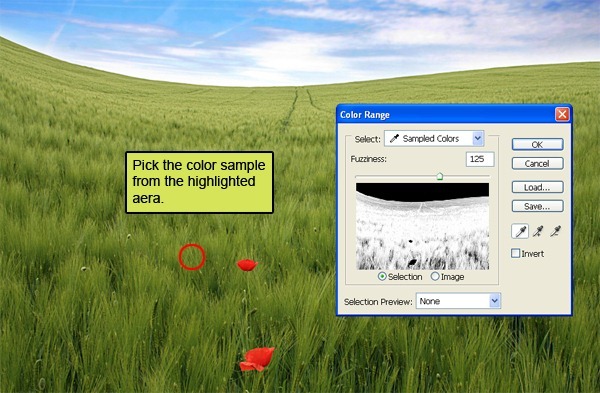
The result should be similar to this:
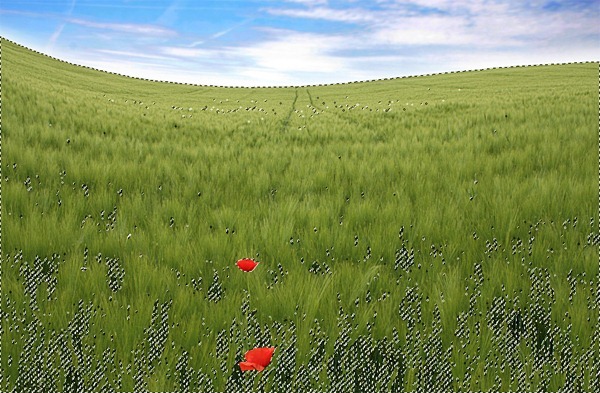
Step 5
Now activate the magic pen tool (R):
(R):
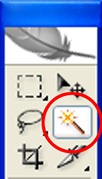
Fill these settings :

Press Shift and click on the highlighted area to make them selected :
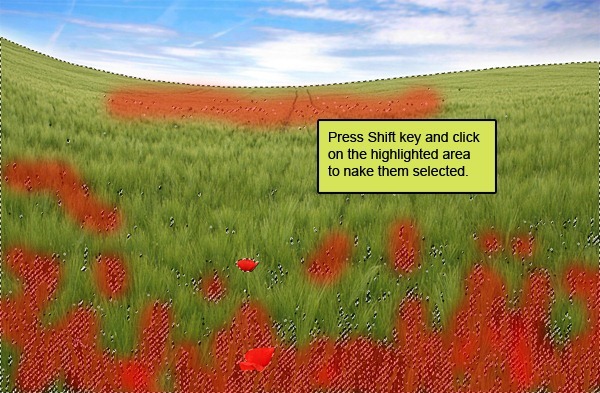
The result should be similar to this.
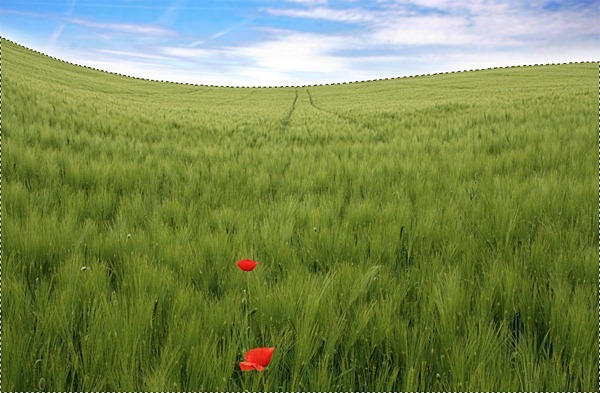
Step 6
Press V to activate the Move Tool. Left-click the image and drag the image to the main canvas and change layer name to “Ground”. The result should be similar to this:
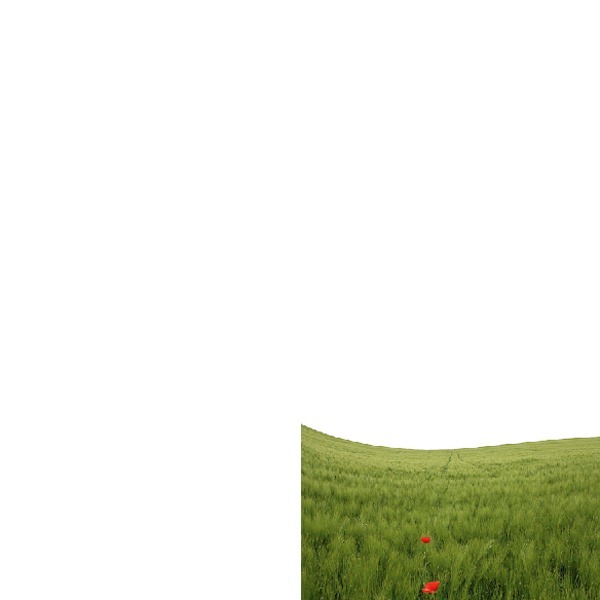
Step 7
Activate transform tool (Ctrl+t) as see below:
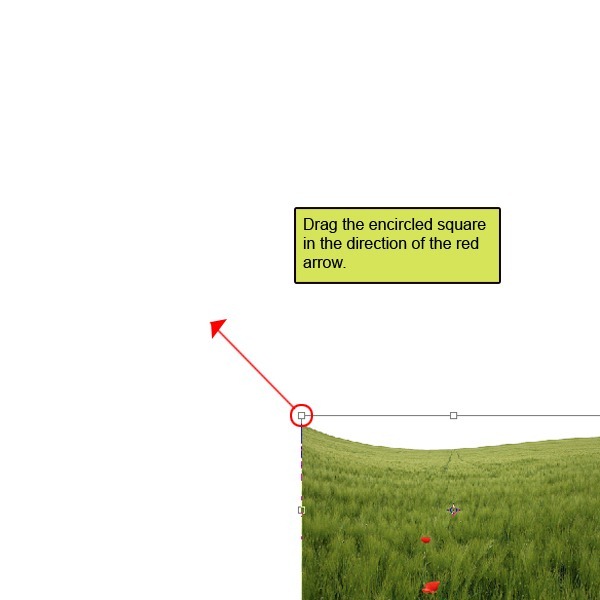
The result should be similar to this:
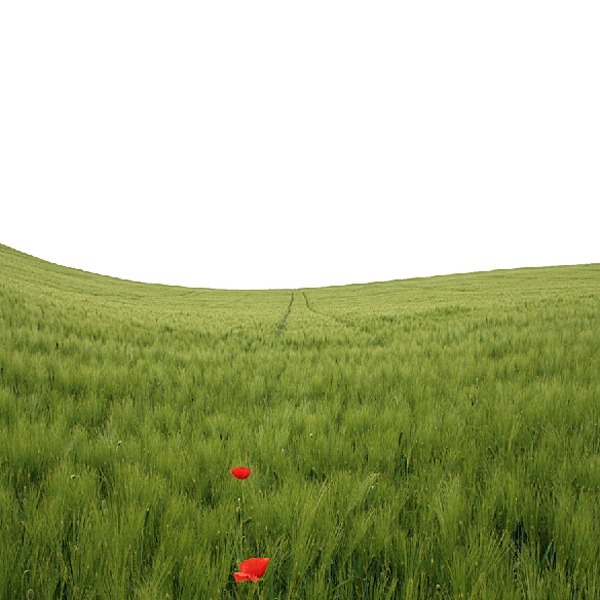
Step 8
Once again activate Transform tool (Ctrl/Cmd+T) and rotate the encircled squares in the direction of the red arrow.
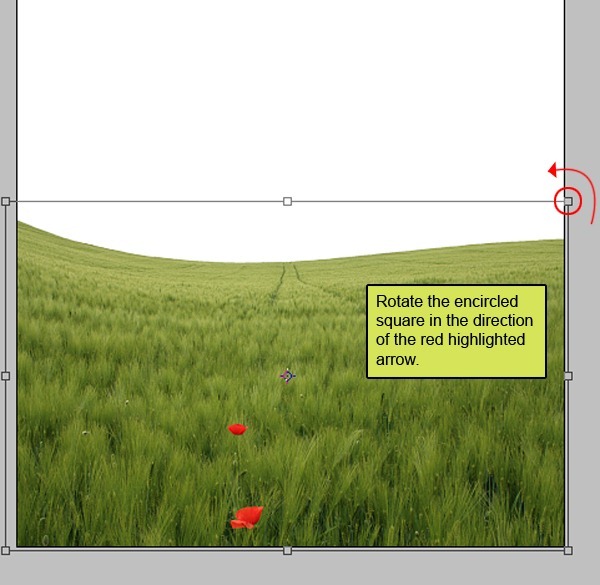
The result should be similar to this:
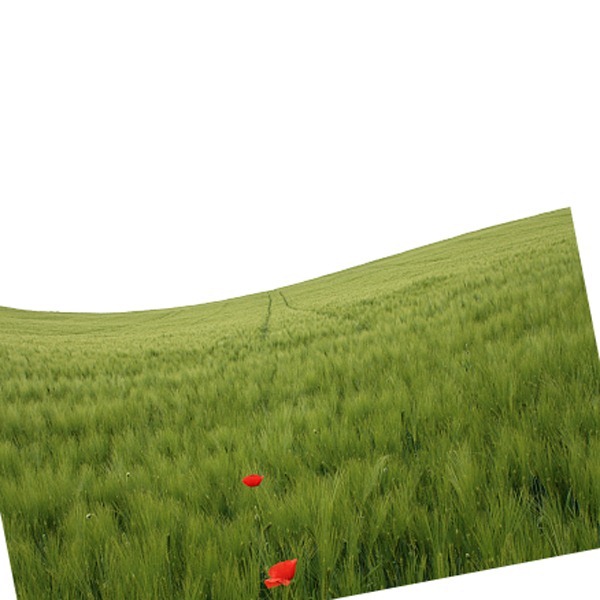
Step 9
Now activate transform tool as see below:
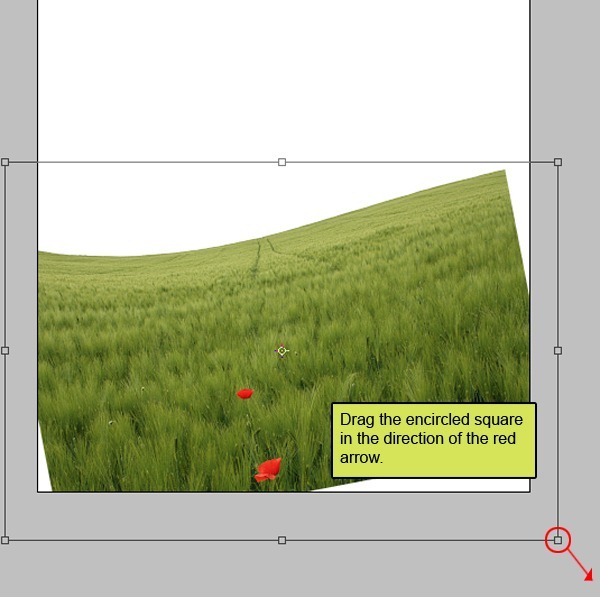
The result should be similar to this:
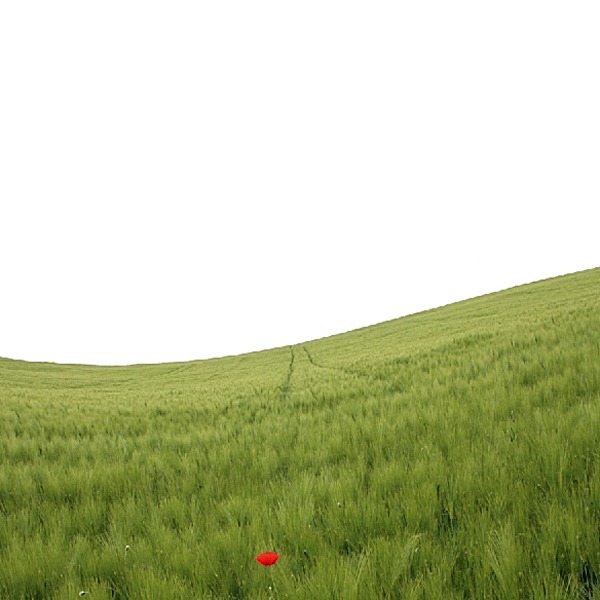
Step 10: Fix Sky
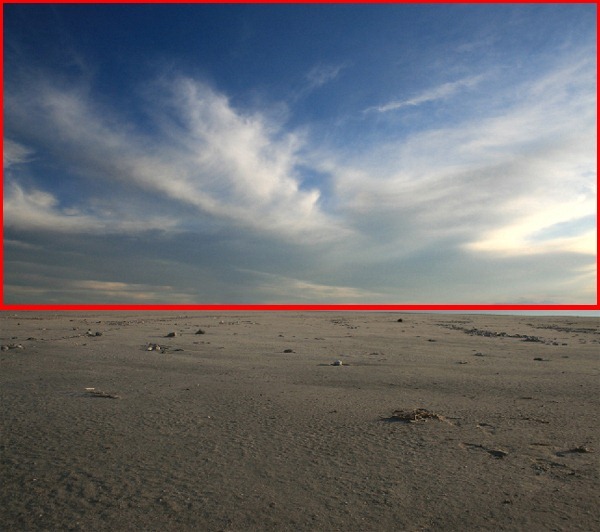
Now, let’s open the desert sunset stock in Photoshop. We will be using the sky from this stock image so we will need to transfer it to our main canvas.
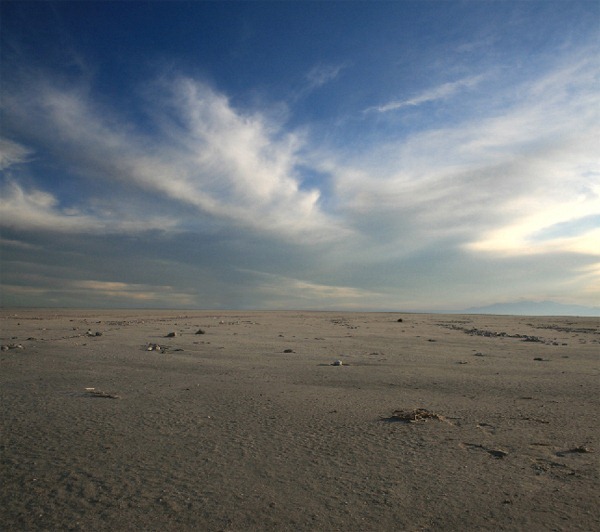
Step 11
Click the desert sunset and press M to Rectangular marquee tool and then make a selection around the sky and then click V to activate the Move Tool. Left-click the image and drag the image to the main canvas
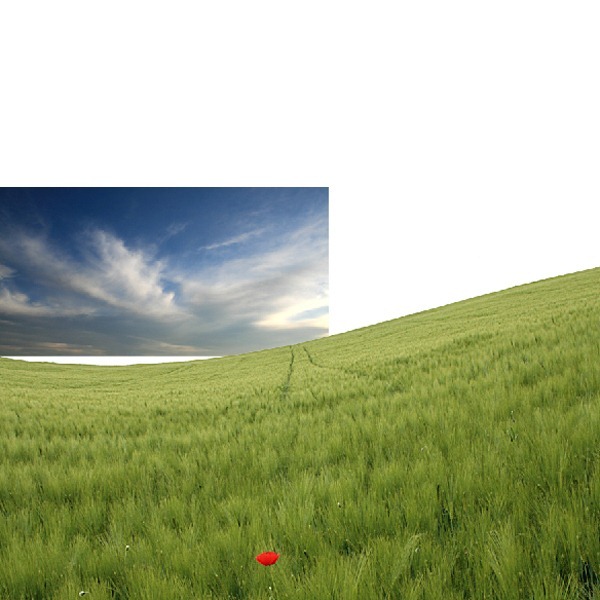
The result should be similar to this:
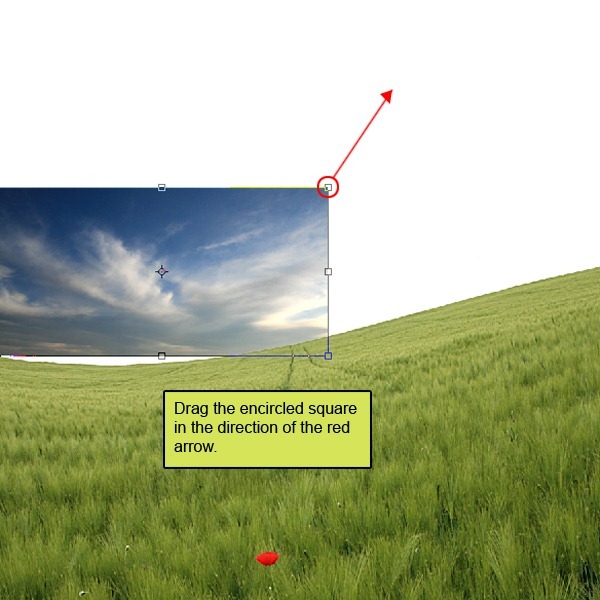
Step 12
Now activate transform tool by using activate transform tool fixed sky properly as see below:
Step 13
Again Activate transform tool (Ctrl/Cmd+T) and rotate the encircled square in the direction of the red arrow .
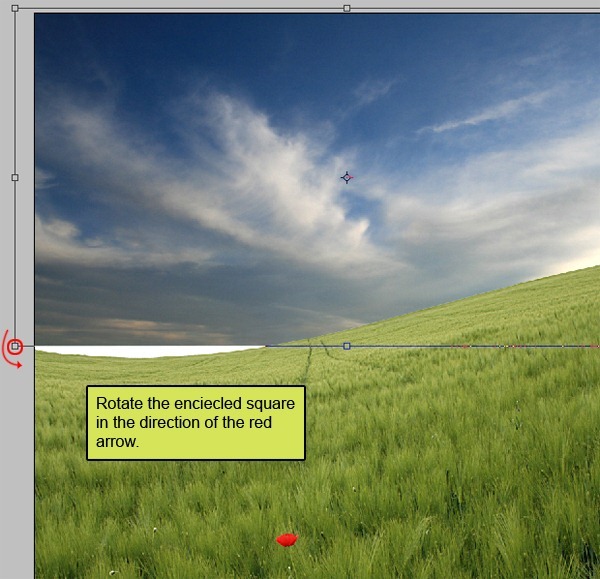
The result should be similar to this:
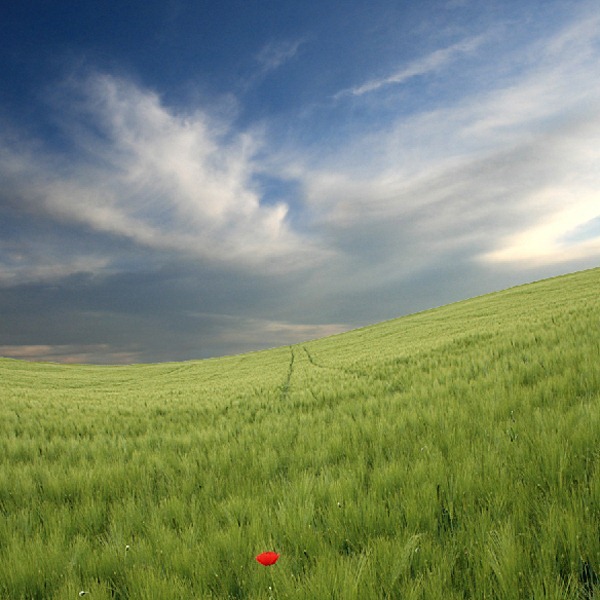
Step 14
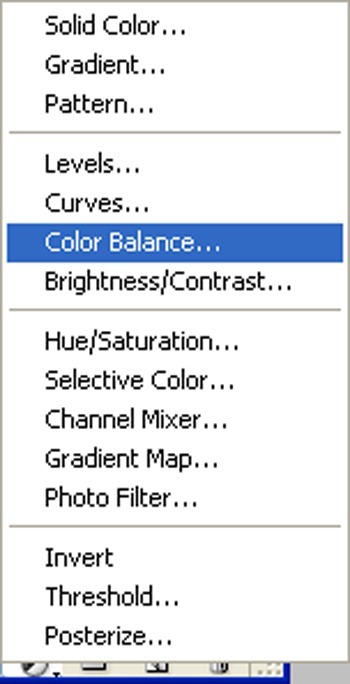
Now create a new color balance adjustment layer from the bottom of layers palette .
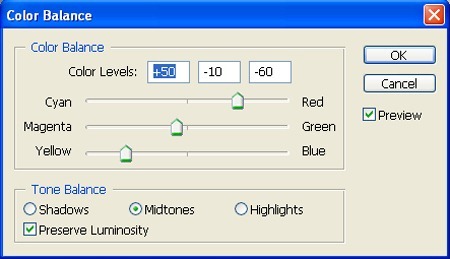
Fill values see as below :
Step 15
Now Press Alt+left click in between 2 layer’s (ground layer and Brightness/Contrast) to make a mask.
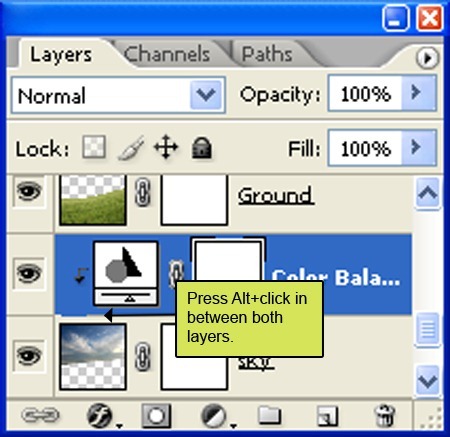
The result should be similar to this:
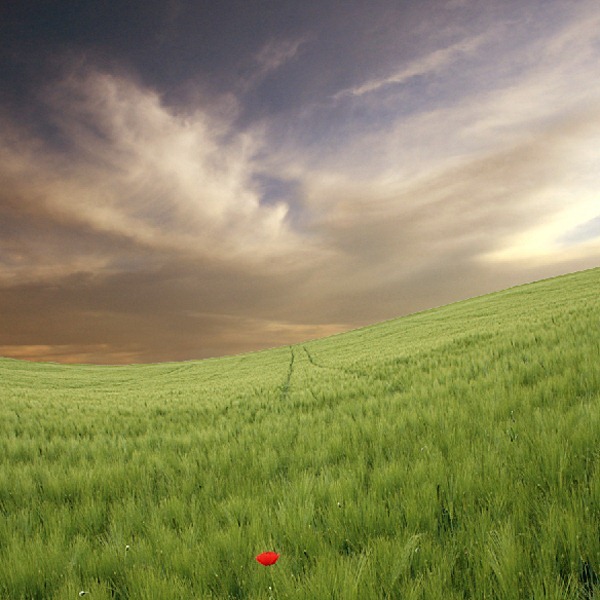
Step 16
Activate Ground layer. Create a new color balance adjustment layer from the bottom of layers palette .
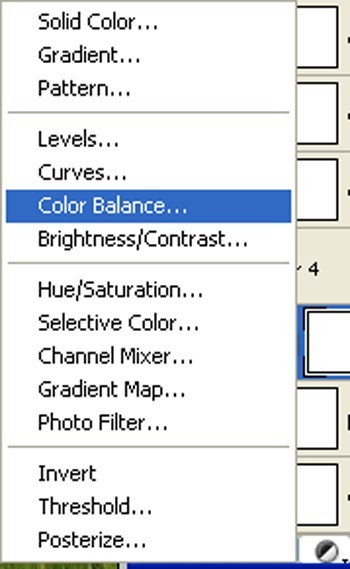
Fill values see as below :
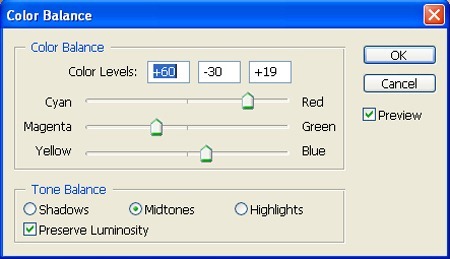
Step 17
Now Press Alt+left click in between 2 layer’s (ground layer and Brightness/Contrast) to make a mask.
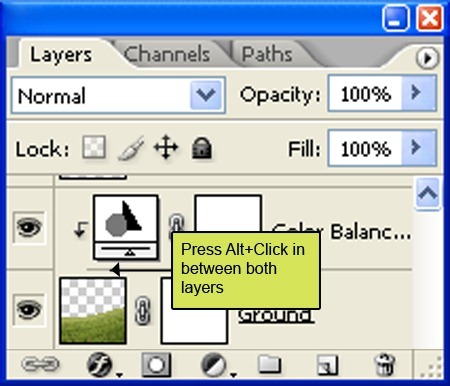
The result should be similar to this:
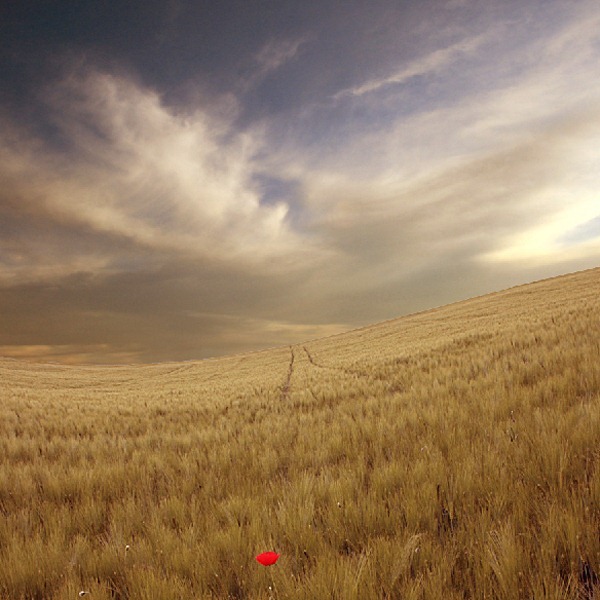
Step 18
Activate a new layer and name it “Source light”. Activate Brush tool (B) with these settings :
- Brush size: 400px
- Hardness: 0%
- Opacity: 25%
- Flow: 100%
- Color: #000000
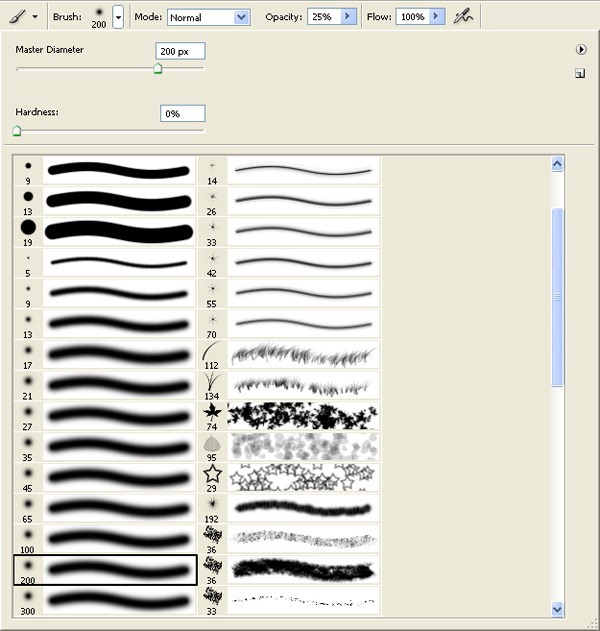
Fill values see as below :
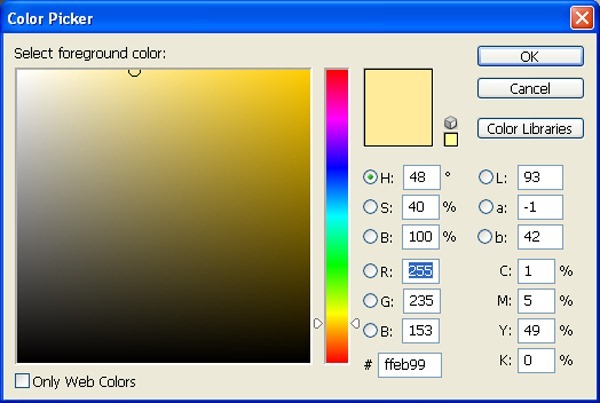
Now paint over the highlighted area.
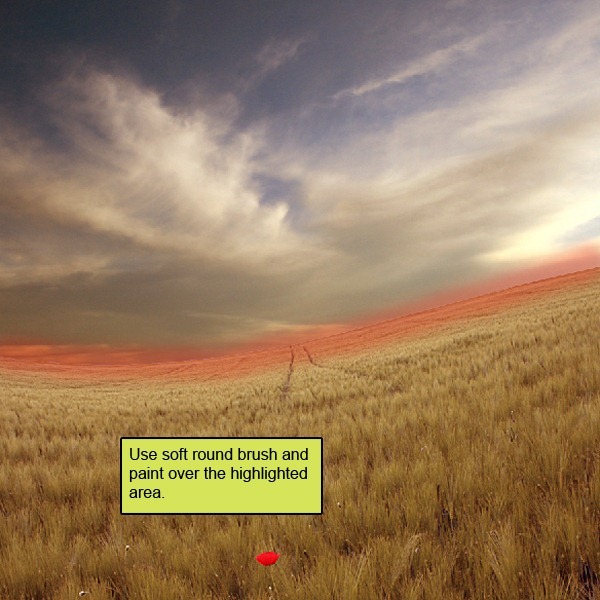
The result should be similar to this:

Step 19: Fix father and son
First off, let’s open Father and Son I stock in Photoshop. We will be using the Father and Son from this stock image so we will need to transfer it to our main canvas.
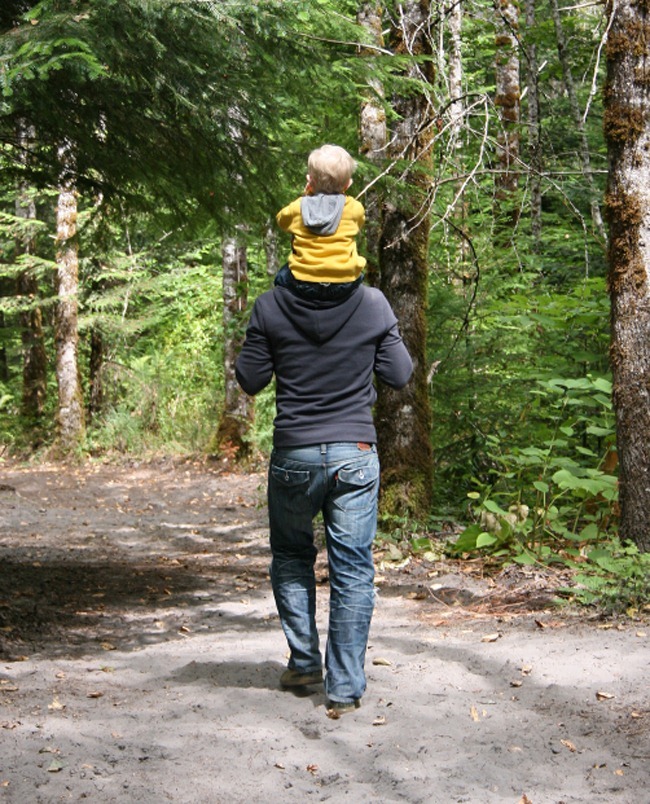
Step 20
Click the Father and Son I stock and press P to activate pen tool and then make a selection around the Father and Son and then click V to activate the Move Tool. Left-click the image and drag the image to the main canvas and change layer name to “Father and Son”
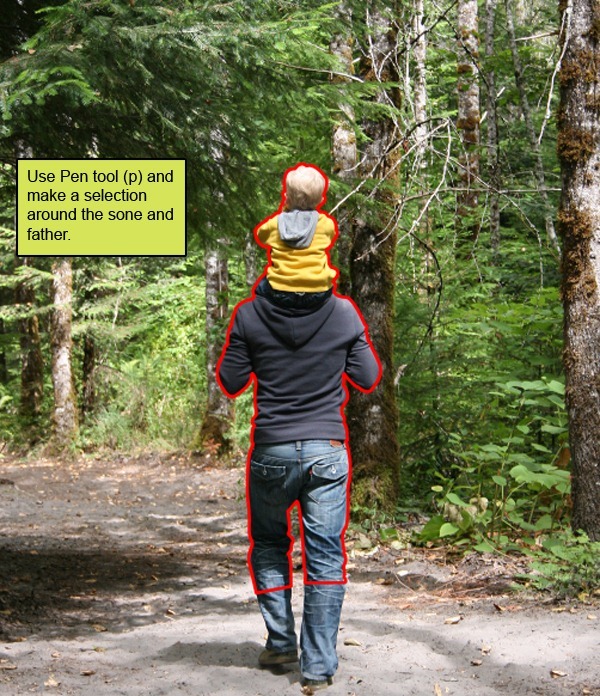
The result should be similar to this:
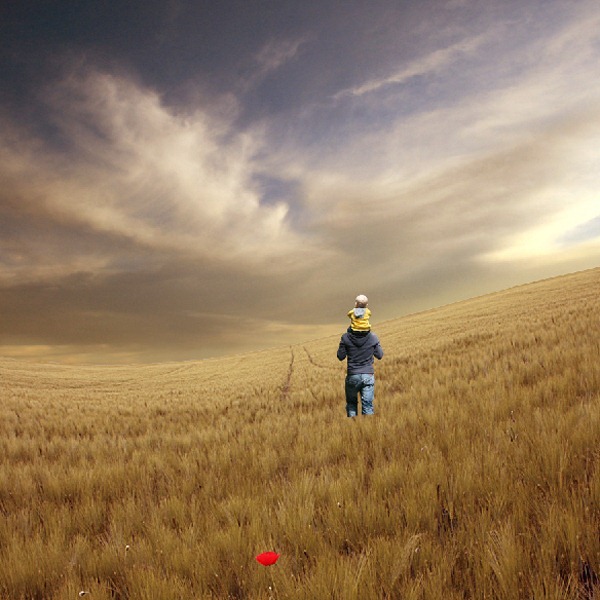
Step 21
Next, activate the Transform tool (Ctrl/Cmd +T), then while the “Father and Son” layer is selected and then resize it as shown below:
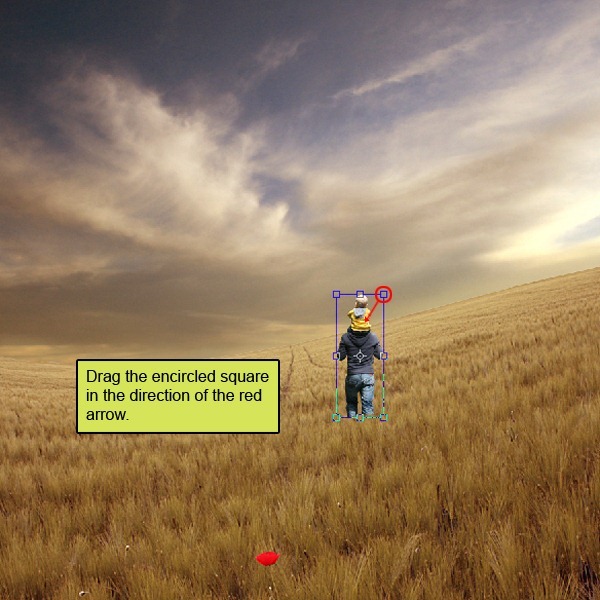
The result should be similar to this:
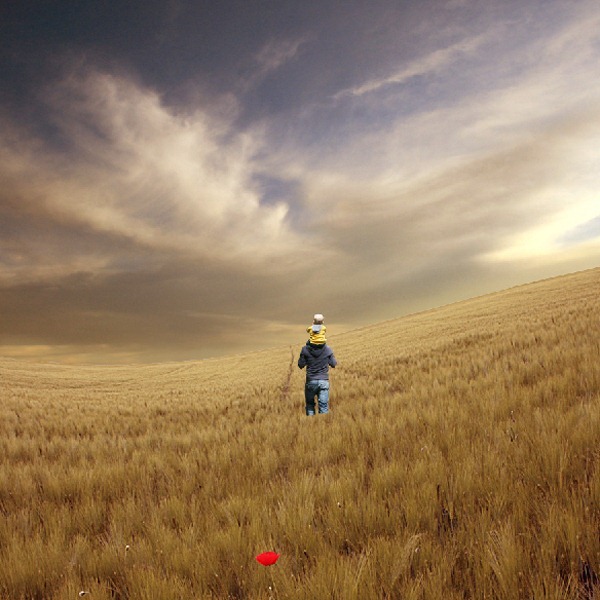
Step 22
Next, activate the Transform tool (Ctrl/Cmd +T), then while the “Father and Son” layer is selected and then resize it as shown below:
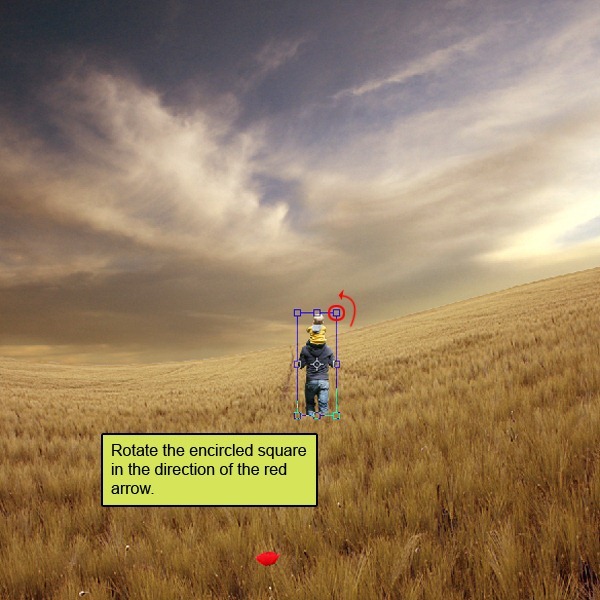
The result should be similar to this:

Step 23
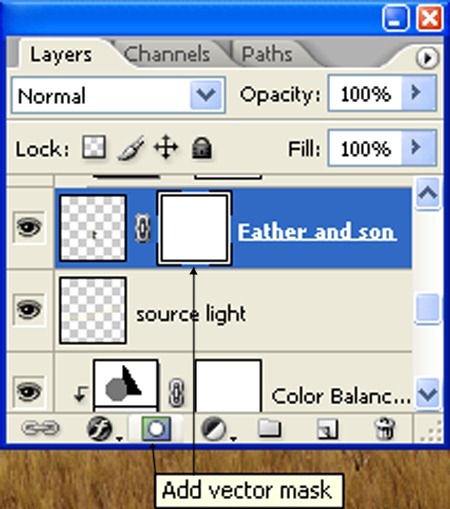
Now Press Alt+left click in between 2 layer’s to add vector mask .
Step 24
Activate the brush tool (B) then right click on the canvas while the Brush tool (B) is active and then pick this brush:

Step 25
Activate Erase tool (E) with these settings:
- Brush size: 400px
- Hardness: 0%
- Opacity: 40%
- Flow: 100%
Erase like shown in the image below.
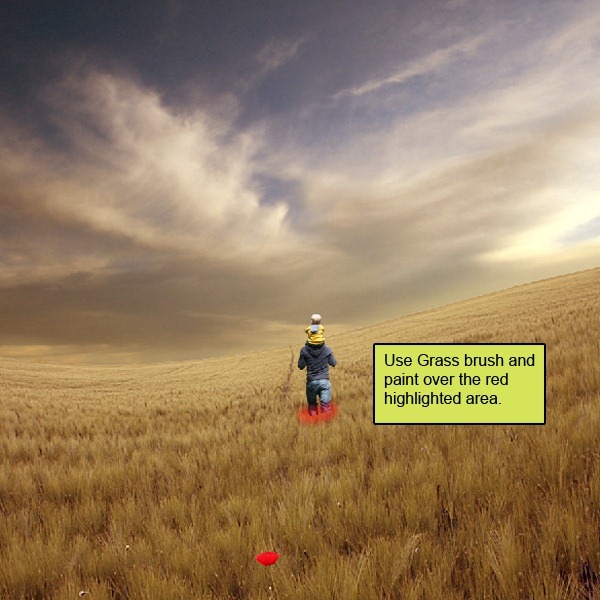
The result should be similar to this:

Step 26
Create a new color balance adjustment layer from the bottom of layers palette .
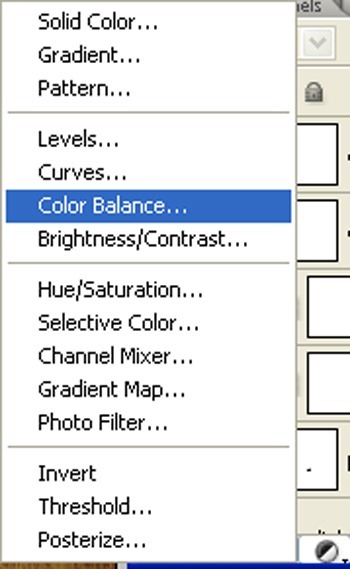
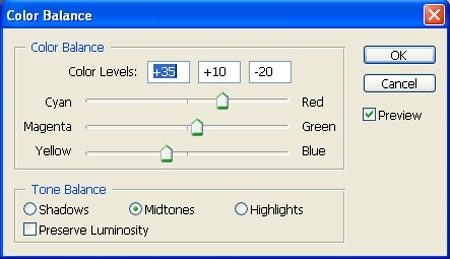
Fill values see as below :
Step 27
Now Press Alt+left click in between 2 layer’s (father and son layer and Color balance) to make a mask.
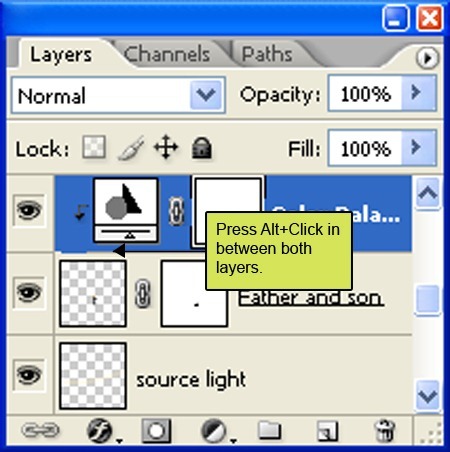
The result should be similar to this:

Step 28
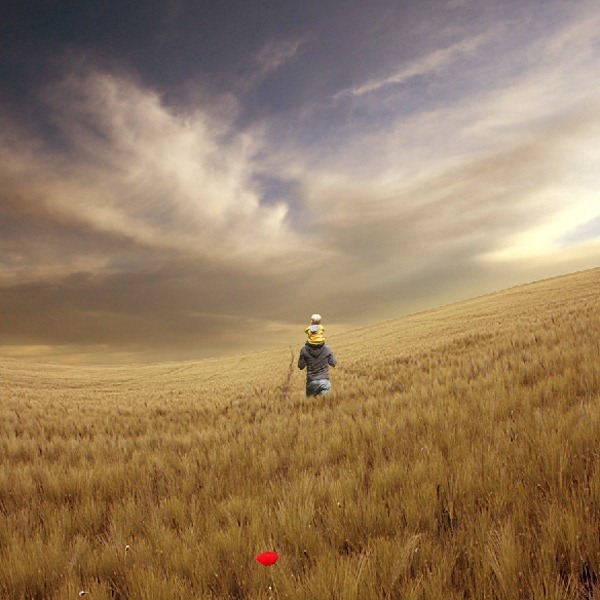
Now create a new Hue/Saturation adjustment layer from the bottom of layers palette .Press Alt+left click in between 2 layer’s (father and son layer and Hue/Saturation) to make a mask.
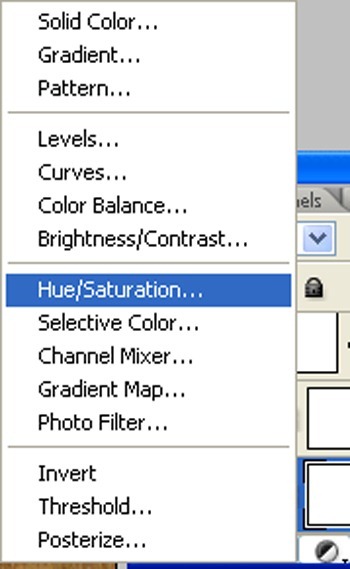
When the Hue/Saturation box opens, input the following:
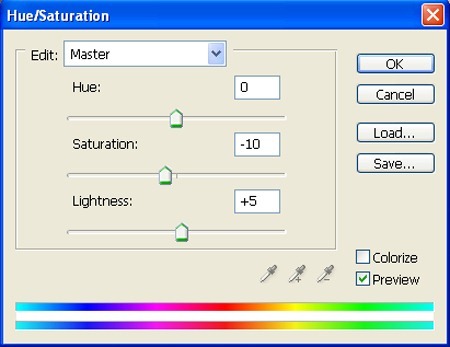
The result should be similar to this:
Step 29: Fix windmill
First off, let’s paper windmill stock in Photoshop. We will be using the paper windmill stock from this stock image so we will need to transfer it to our main canvas.:
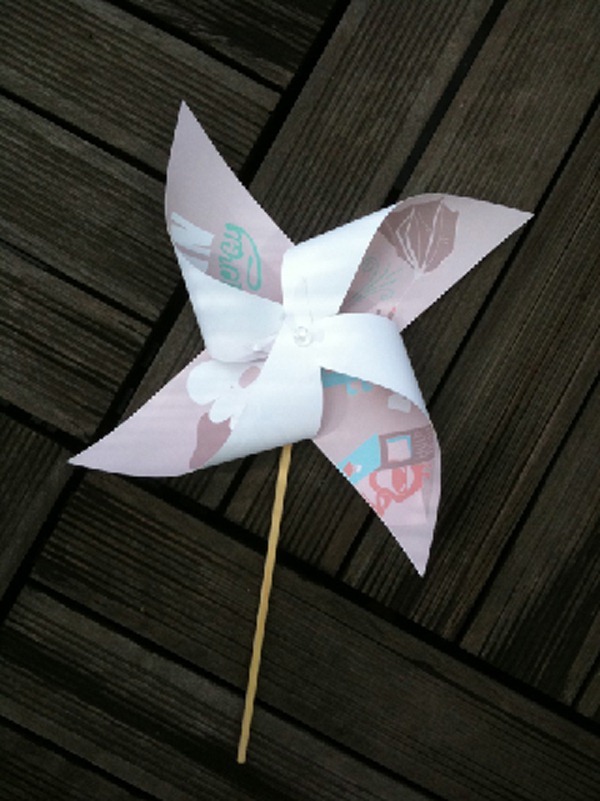
Step 30
Click the paper windmill stock and press P to activate pen tool and then make a selection around the paper windmill and then click V to activate the Move Tool. Left-click the image and drag the image to the main canvas and change layer name to “paper windmill”. :
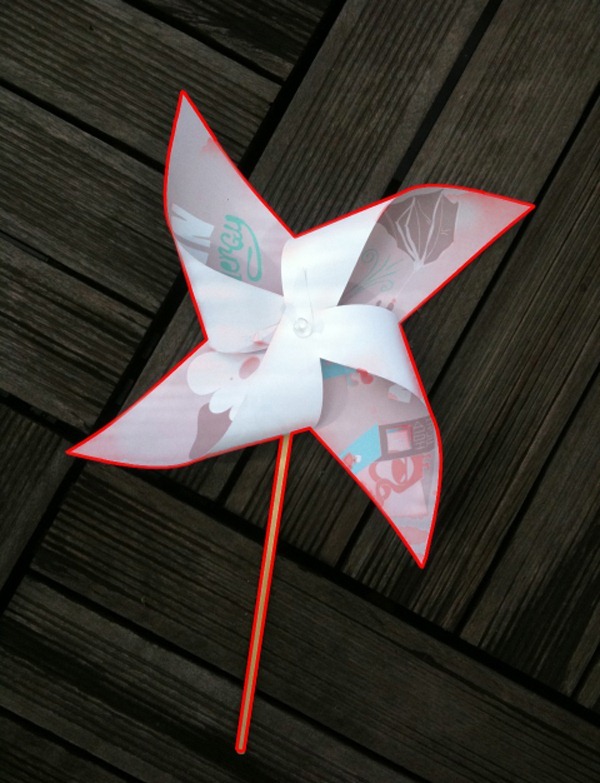
The result should be similar to this:
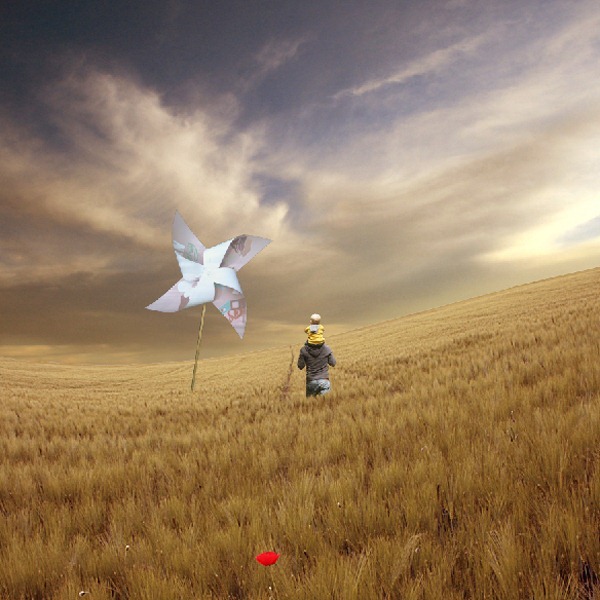
Step 31
Next, activate the Transform tool (Ctrl/Cmd +T), then while the “paper windmill” layer is selected and then resize it as shown below: :
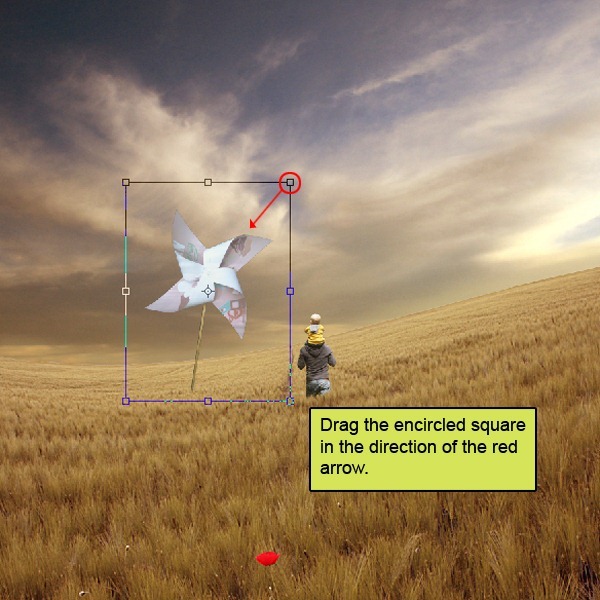
The result should be similar to this:
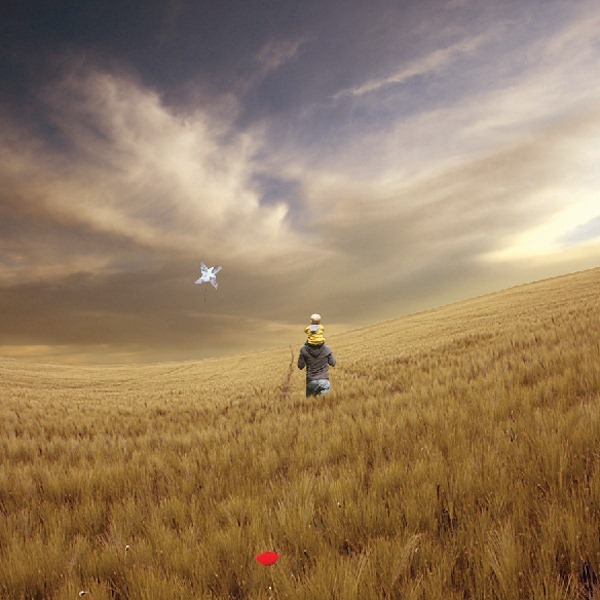
Step 32
Activate the Transform tool (Ctrl/Cmd +T), then while the “paper windmill” layer is selected and then resize it as shown below:
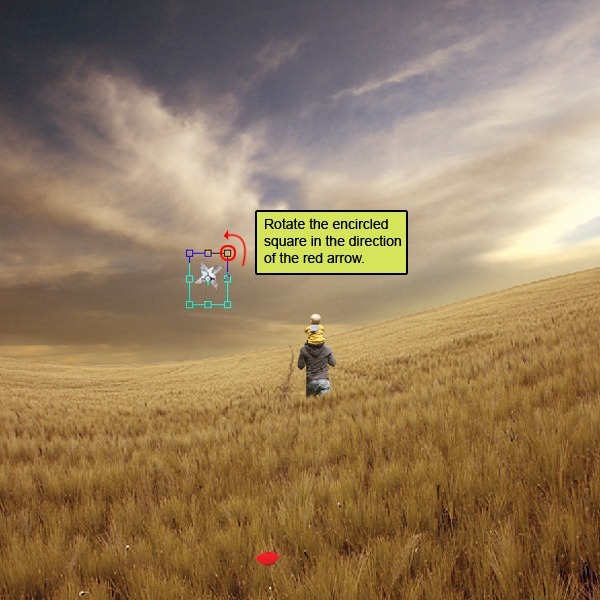
The result should be similar to this.
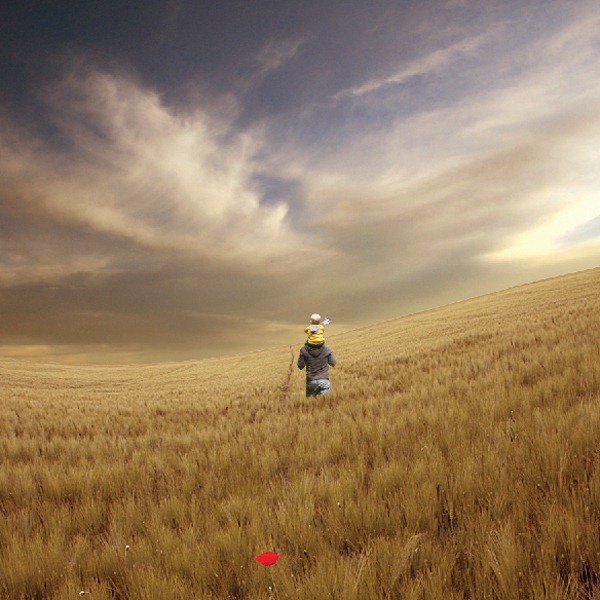
Step 33
Create a new Curves adjustment layer from the bottom of layers palette:
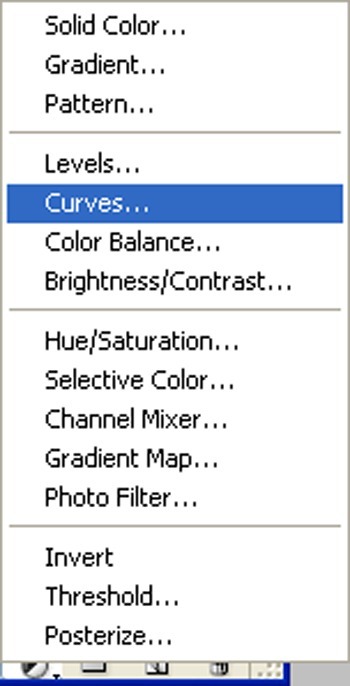
Step 34
Press Alt+left click in between 2 layer’s (paper windmill layer and Curve) to make a mask.:
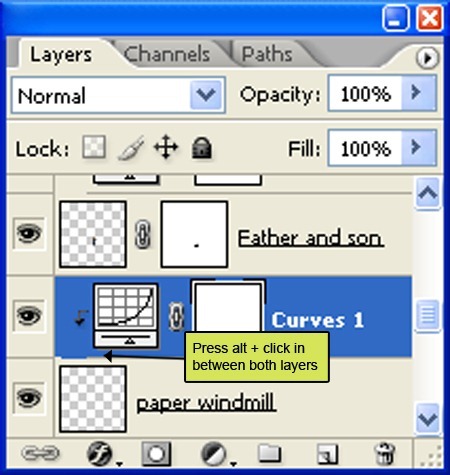
The result should be similar to this:

Step 35: Fix paper plane
First off, let’s paper plane stock in Photoshop. We will be using the paper plane stock from this stock image so we will need to transfer it to our main canvas.:

Step 36
Click paper plane and press P to activate pen tool and then make a selection around the paper plane and then click V to activate the Move Tool. Left-click the image and drag the image to the main canvas and change layer name to “paper plane”.

The result should be similar to this:
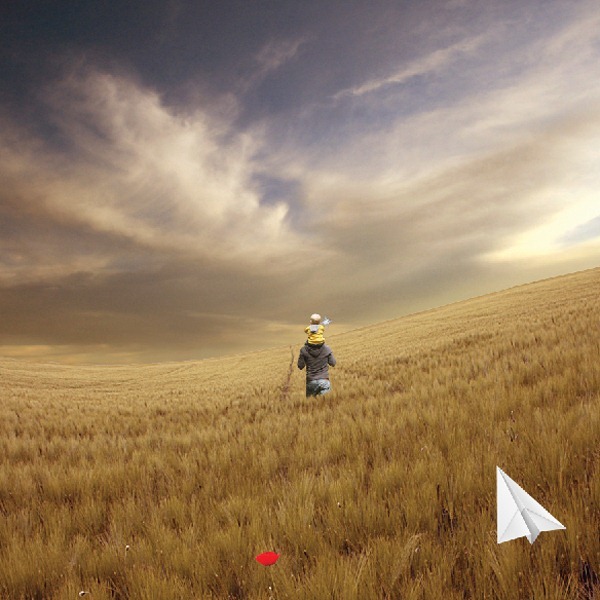
Step 37
Next, activate the Transform tool (Ctrl/Cmd +T), then while the “paper plane” layer is selected and then resize it as shown below:
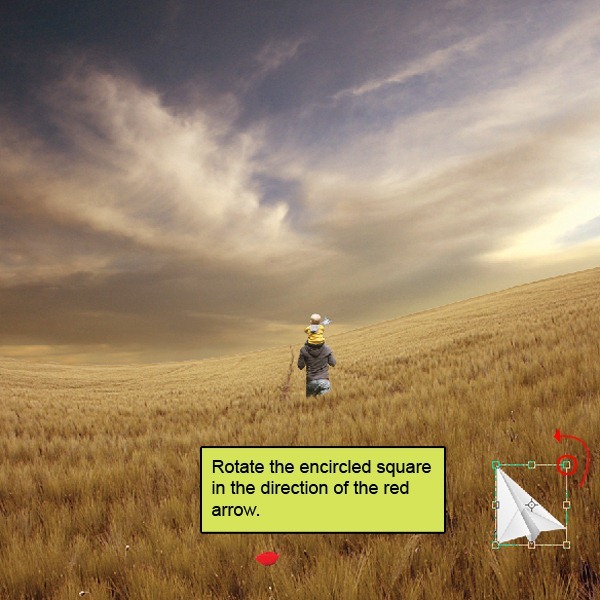
The result should be similar to this:

Step 38
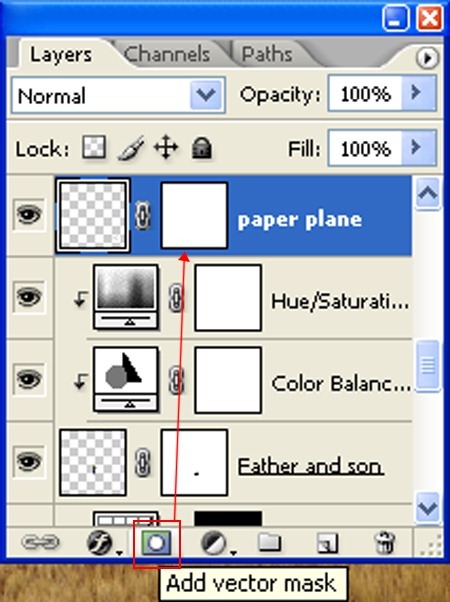
Add a vector mask to paper plane layer from bottom of layer window :
Step 39
Activate the brush tool (B) then right click on the canvas while the Brush tool (B) is active and then pick this brush:
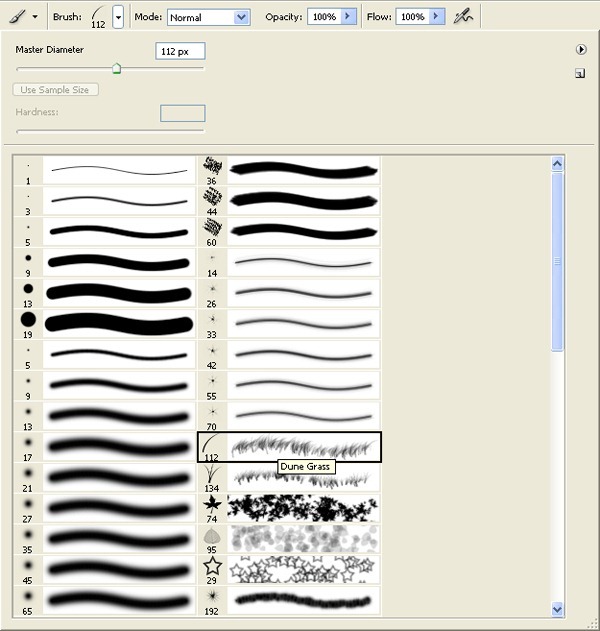
Now use grass brush and paint over the highlighted area.
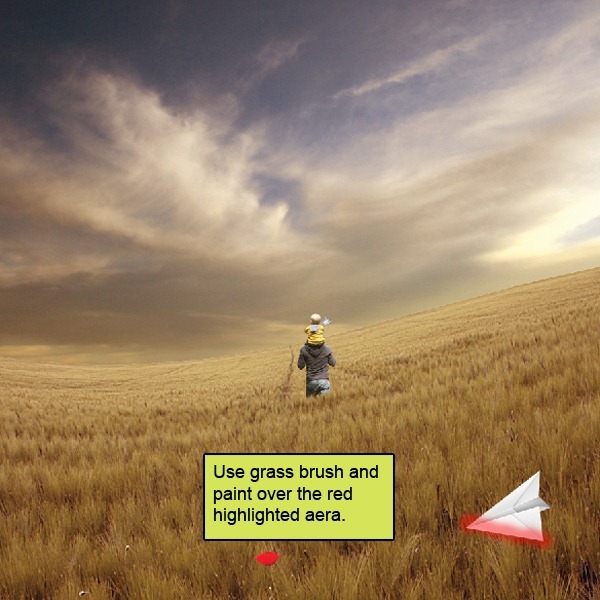
The result should be similar to this.

Step 40
Now go back to “paper plane” layer and then creat a Color Balance adjustment layer which can be found by pressing on the Create New Fill/Adjustment layer button shown on the layer window::
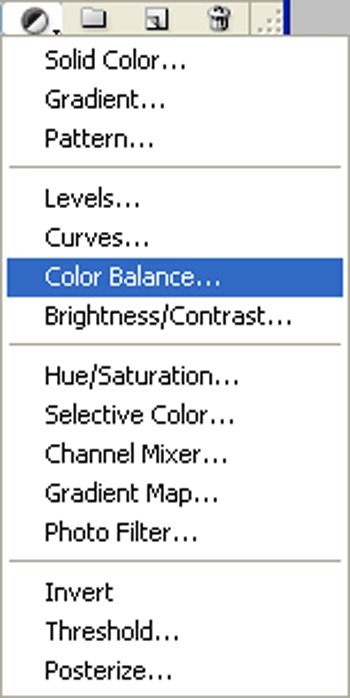
When the Color Balance box opens, input the following::

Step 41
Press Alt+left click in between 2 layer’s (paper plane layer and Color Balance) to make a mask..
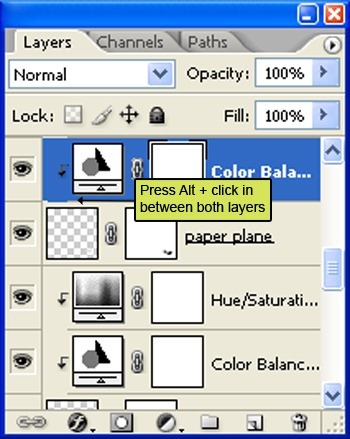
The result should be similar to this:
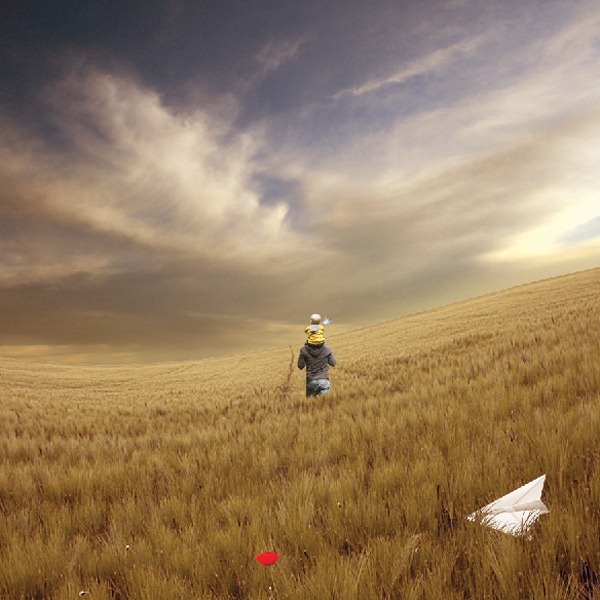
Step 42
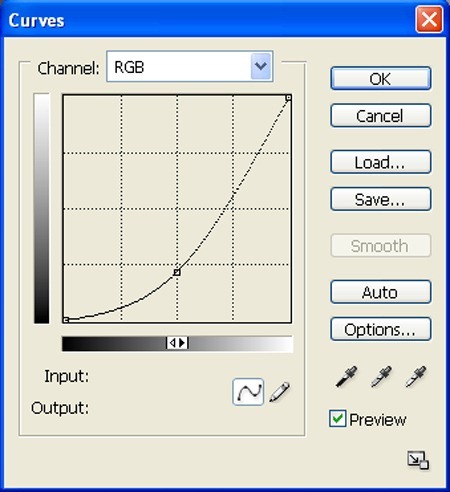
Create a new Curves adjustment layer from the bottom of layers palette. Press Alt+left click in between 2 layer’s (paper plane layer and Curves) to make a mask.
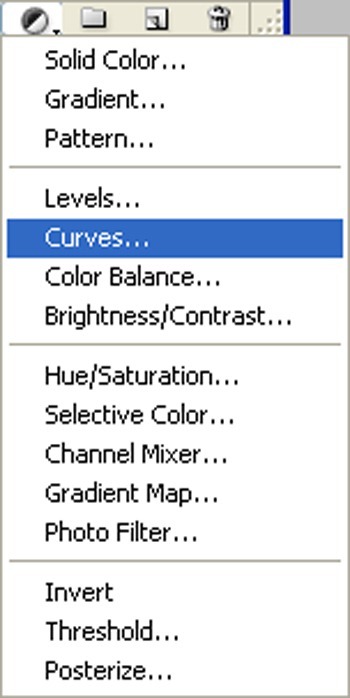
When the Curves box opens, input the following: .
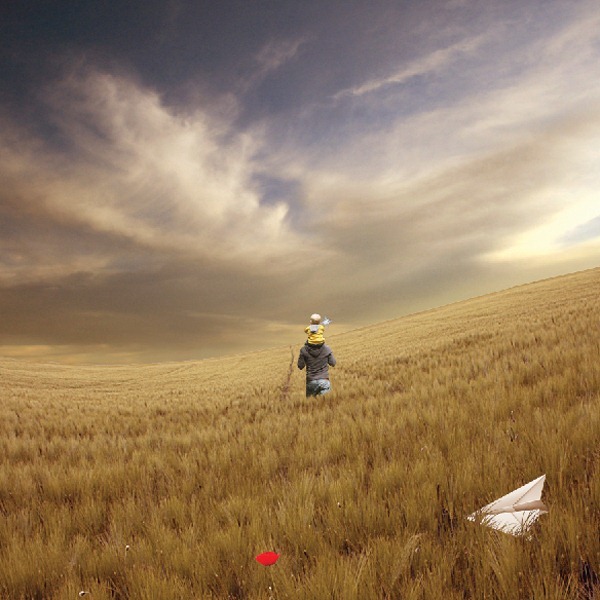
The result should be similar to this :
Step 43
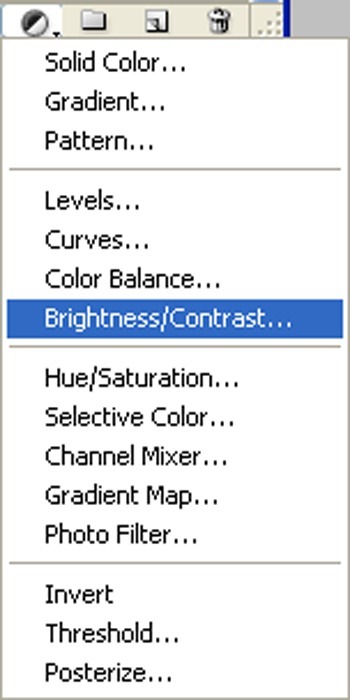
Create a new Brightness/Contrast adjustment layer from the bottom of layers palette.Press Alt+left click in between 2 layer’s (paper plane layer and Brightness/Contrast) to make a mask.
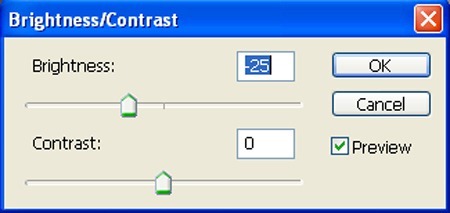
When the Brightness/Contrast box opens, input the following:
The result should be similar to this.

Step 44
Now activate the Blur tool (R):
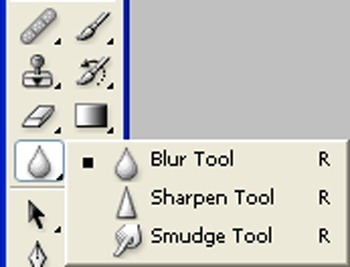
Fill these settings :

Now we are going to use blur tool on the hard edges to make them smooth:
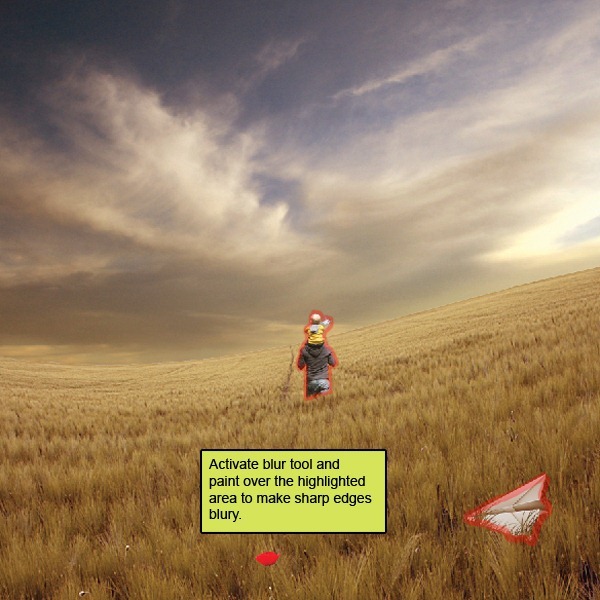
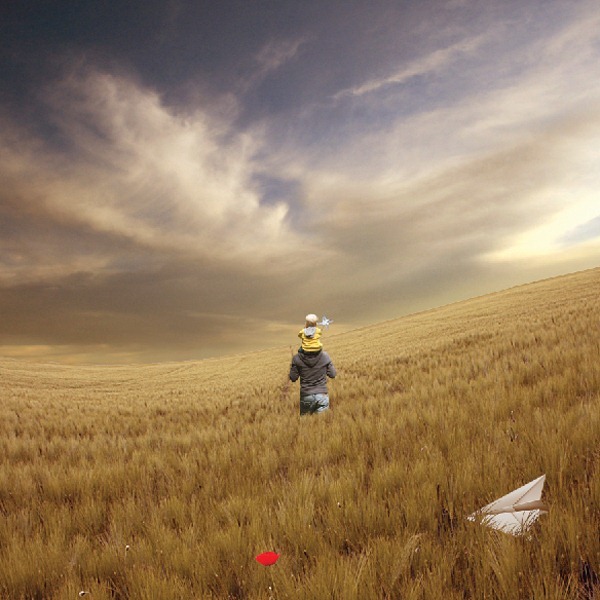
The result should be similar to this. :
Step 45: Fix Birds
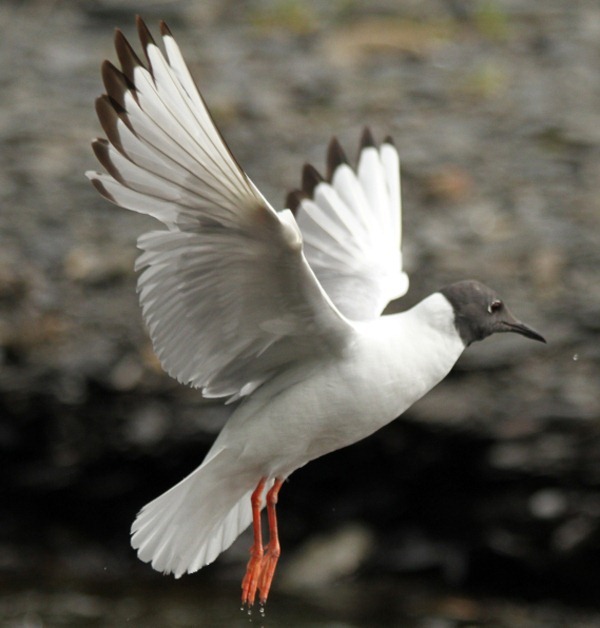
First off, let’s open the Sea bird 29 – EquineStockImages stock in Photoshop. We will be using the Sea bird from this stock image so we will need to transfer it to our main canvas.:
Step 46
Click the Sea bird and press P to activate pen tool and then make a selection around the Sea bird and then click V to activate the Move Tool. Left-click the image and drag the image to the main canvas and change layer name to “Sea bird 1″..
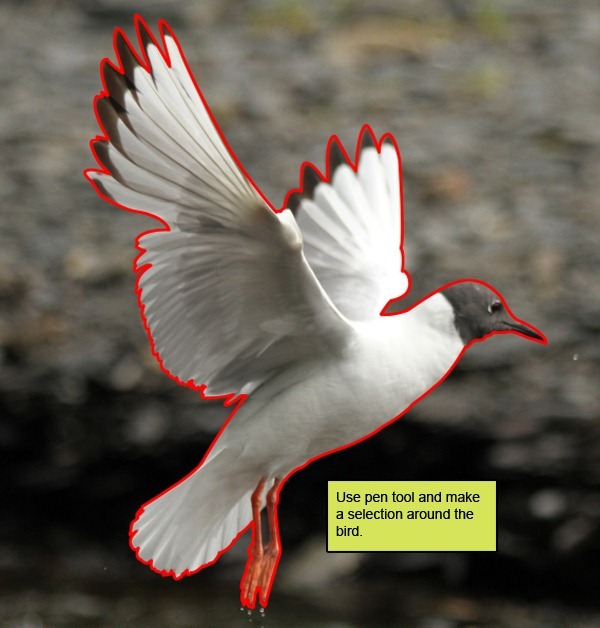
The result should be similar to this:
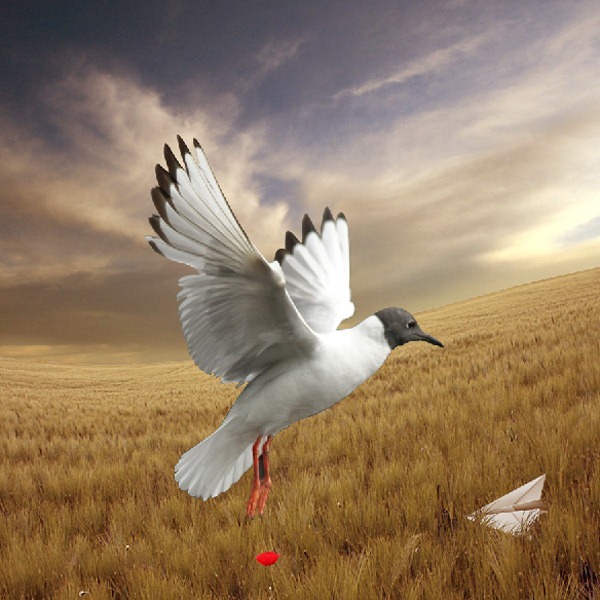
Step 47
Next, activate the Transform tool (Ctrl/Cmd +T), then while the ” Sea bird 1″ layer is selected and then resize it as shown below:
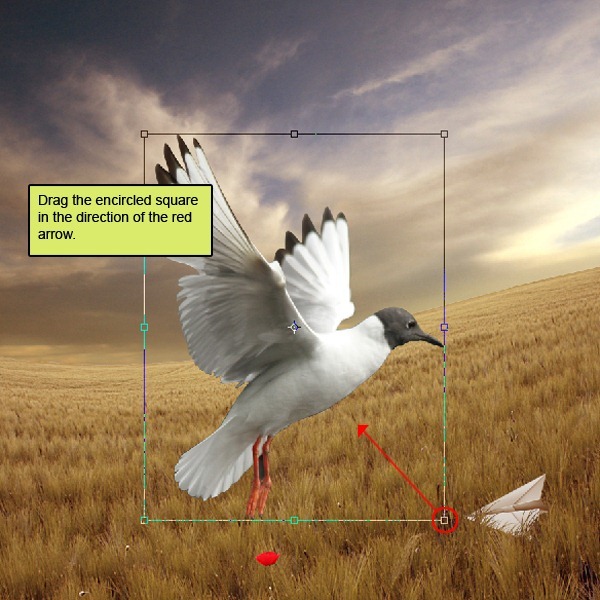
The result should be similar to this:
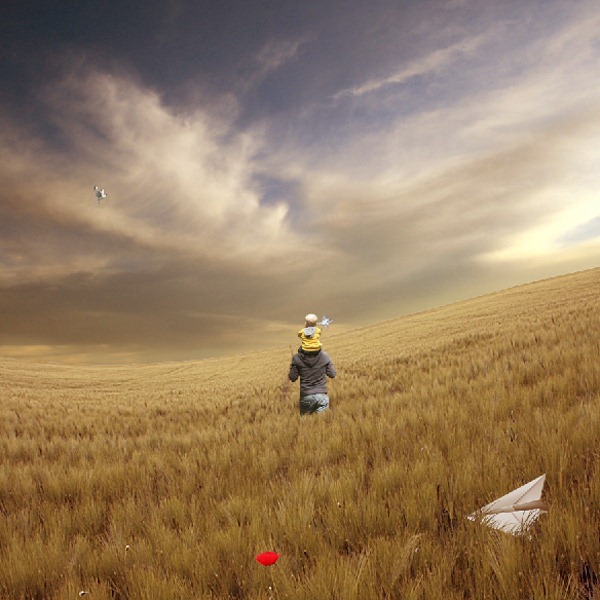
Step 48
Now Crate new Color Balance adjustment layer from the bottom of layers palette .Press Alt+left click in between 2 layer’s (sea bird 1 layer and Color Balance) to make a mask.:
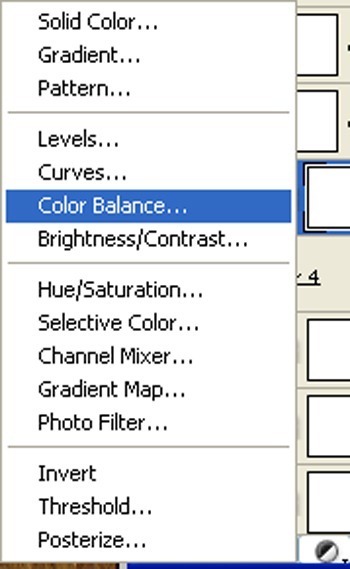
When the Color Balance box opens, input the following:

The result should be similar to this :

Step 49
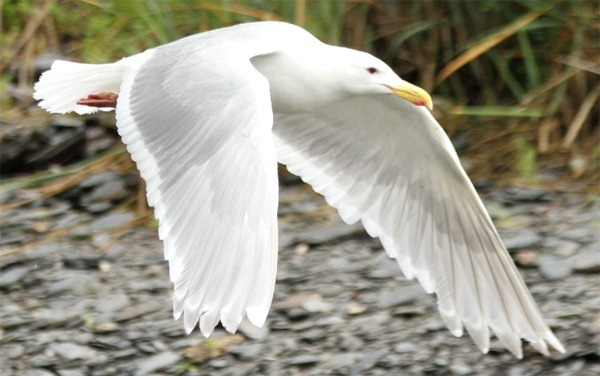
First off, let’s open the Sea bird 99 – EquineStockImages stock in Photoshop. We will be using the Sea bird from this stock image so we will need to transfer it to our main canvas and name it “Sea bird 2″ :
Step 50
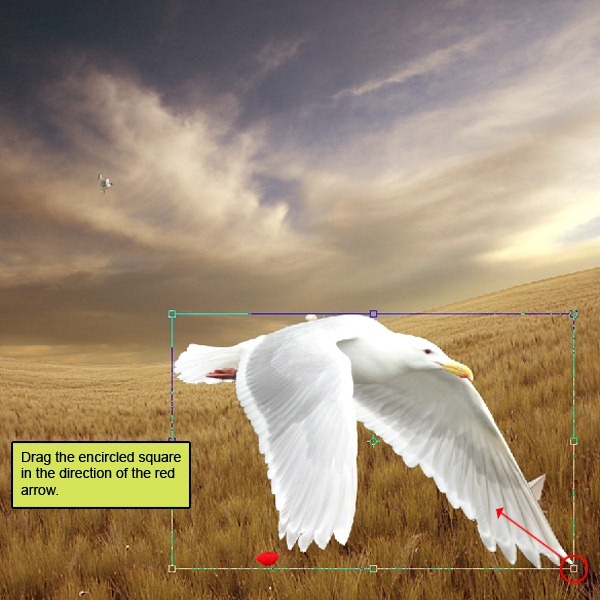
Next, activate the Transform tool (Ctrl/Cmd +T), then while the ” Sea bird 99″ layer is selected and then resize it as shown below:”
Step 51
Click the Sea bird and press P to activate pen tool and then make a selection around the Sea bird 100 and then click V to activate the Move Tool. Left-click the image and drag the image to the main canvas and change layer name to “Sea bird 3″.:
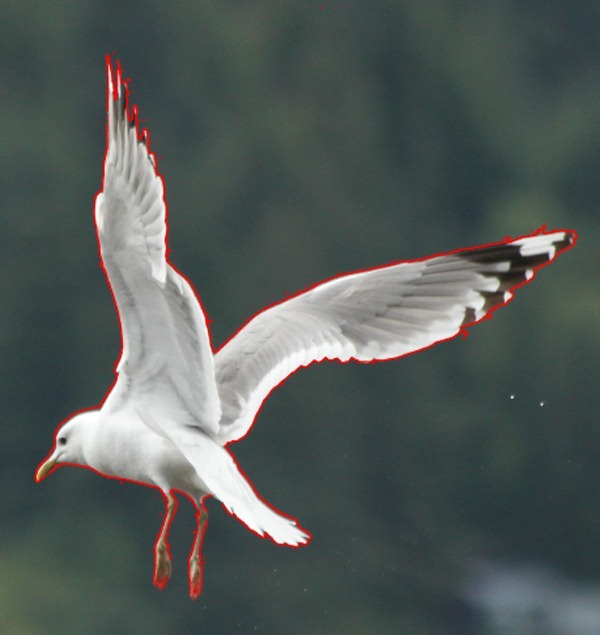
The result should be similar to this:
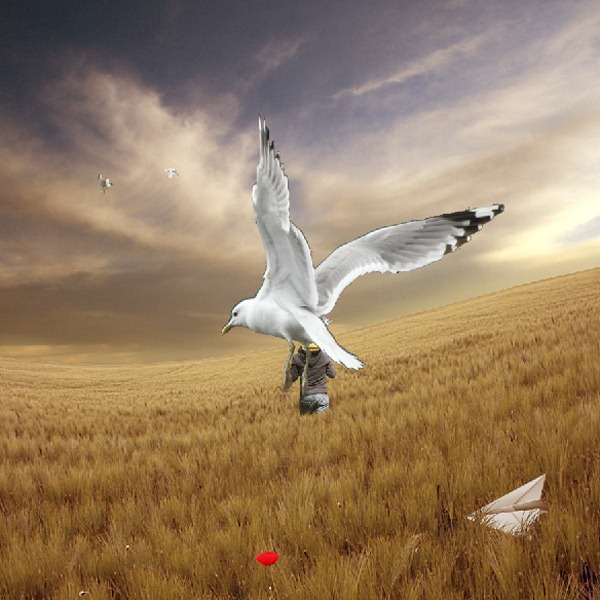
Step 52
Next, activate the Transform tool (Ctrl/Cmd +T), then while the “Sea bird 100″ layer is selected and then resize it as shown below:”
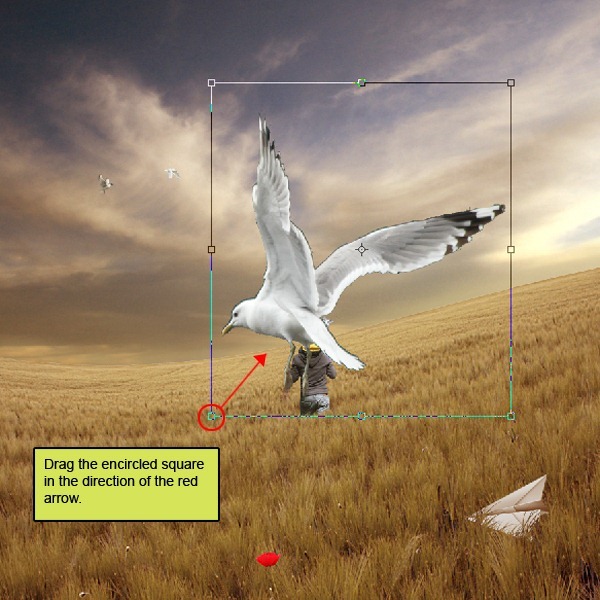
The result should be similar to this:

Step 53: Enhance the Color of the Image
Now Crate new solid color adjustment layer from the bottom of layers palette :
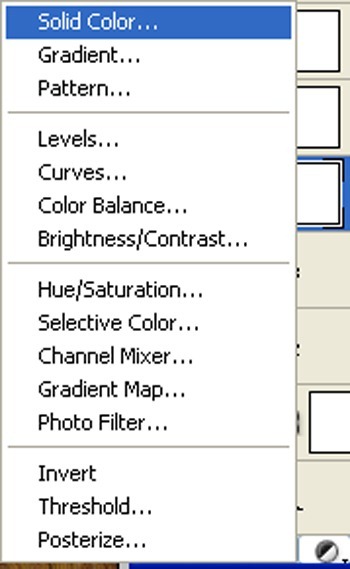
When the solid color box opens, input the following:
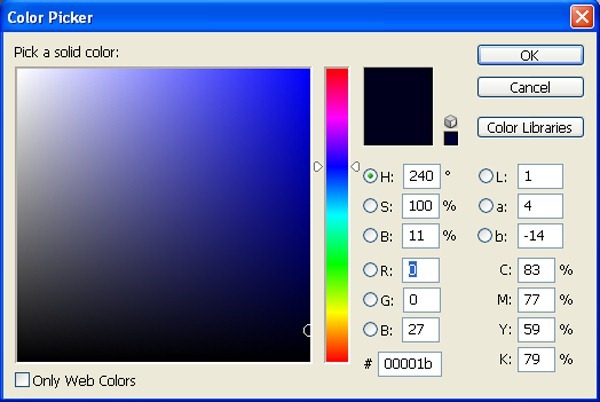
Step 54
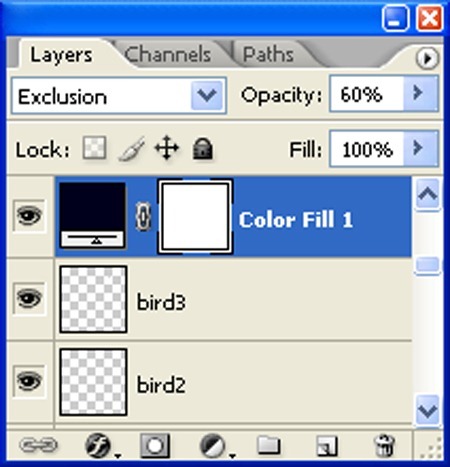
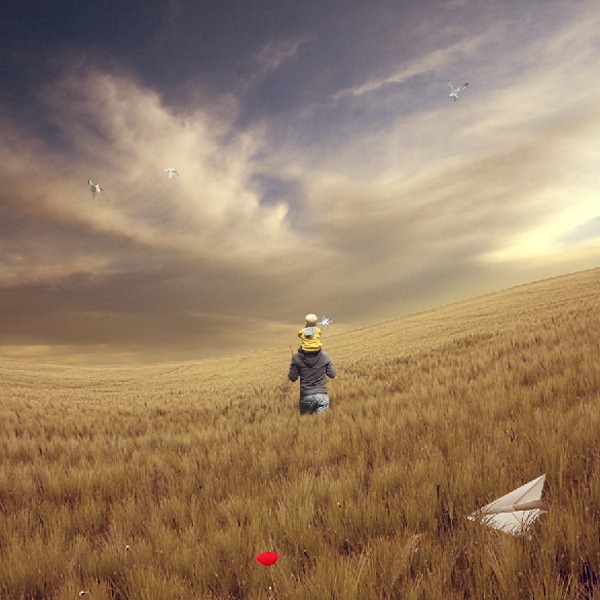
Reduce the opacity of the color fill layer to 60% and change the layer mode to “Exclusion” .
The result should be similar to this:
Step 55
Create a new solid color adjustment layer from the bottom of layers palette .
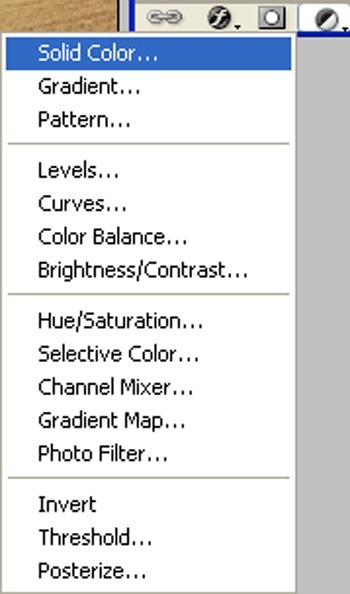
When the solid color box opens, input the following:
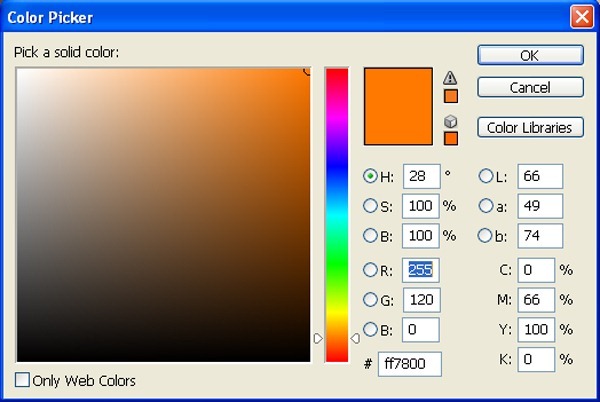
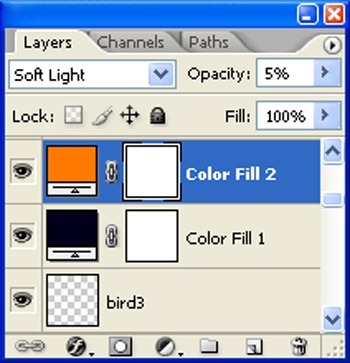
Step 56
Reduce the opacity of the color fill layer to 5% and change the layer mode to “Soft light” :
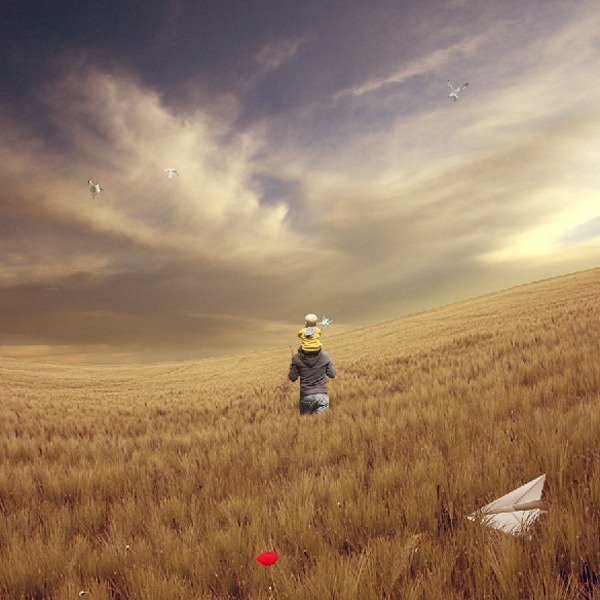
The result should be similar to this:
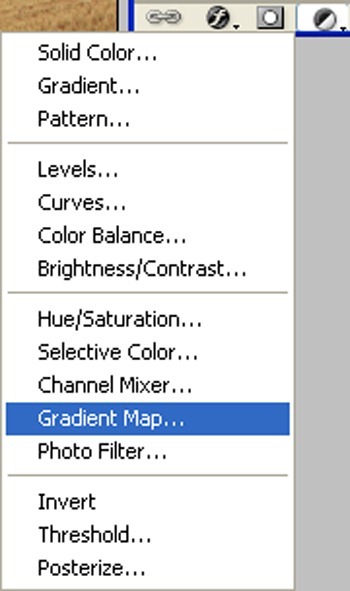
Step 57
Create a Gradient Map adjustment layer which can be found by pressing on the Create New Fill/Adjustment layer button shown on the layer window:
When the Gradient Map box opens, input the following:
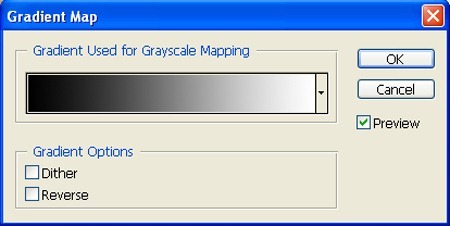
Step 58
Change the layer mode to “Luminosity” and the opacity to 100% :
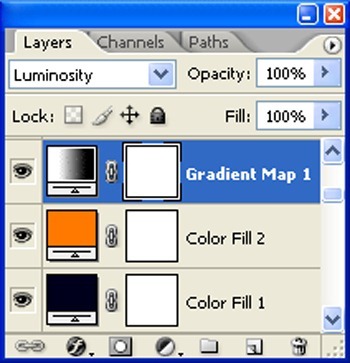
The result should be similar to this:
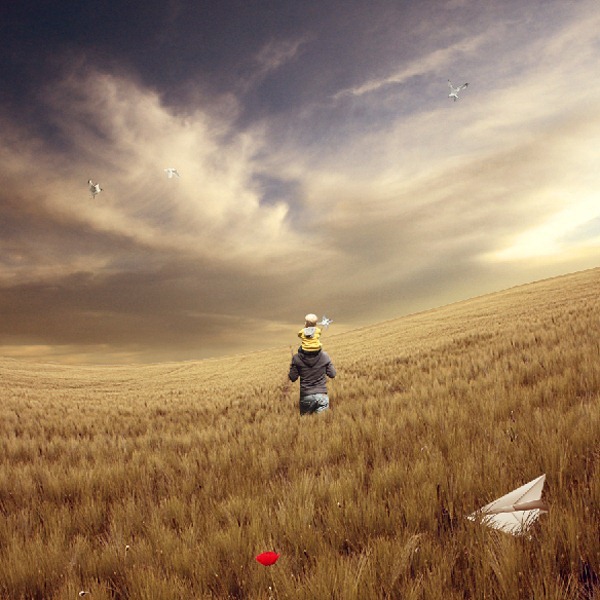
Step 59
Create a new Color Balance adjustment layer from the bottom of layers palette .
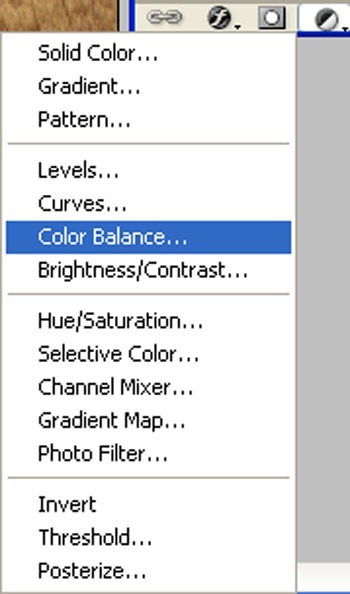
When the Color Balance box opens, input the following:
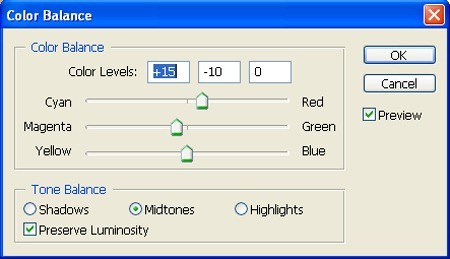
Step 60
Reduce the opacity on the color balance to 65%:
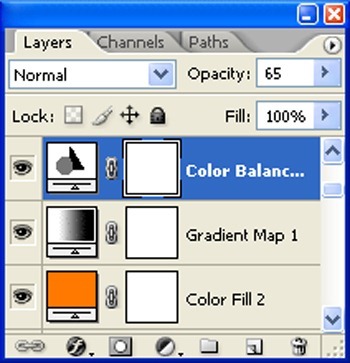
The result should be similar to this:
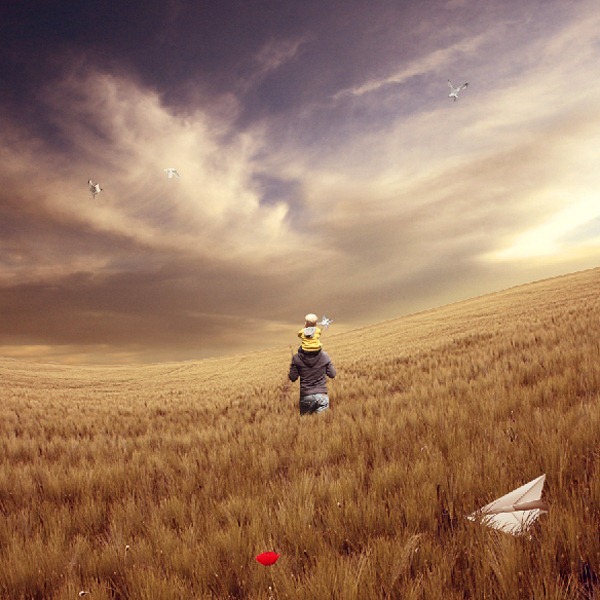
Step 61
Create a new Curves adjustment layer from the bottom of layers palette .
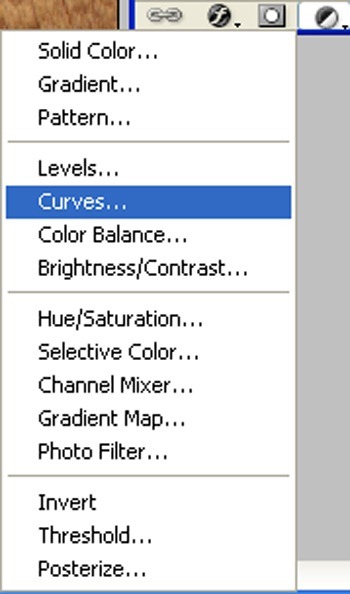
When the Curves box opens, input the following:
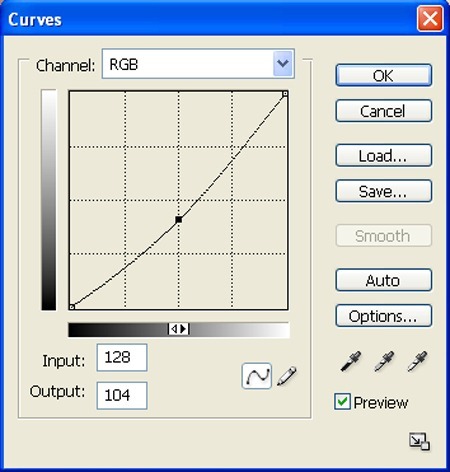
The result should be similar to this:
Step 62 : Create a Vignette
In this step, we will learn how to create a vignette which will help enhance the focus on our subject. First make a new layer and name it “Vignette”. Fill it with white (#000000):

Step 63
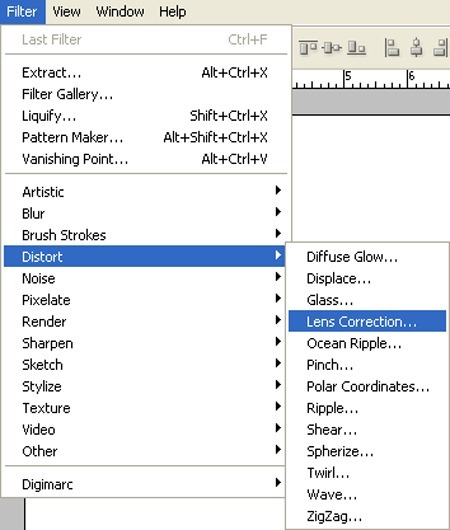
Go to Filters > Distort > Lens Correction:
When the Lens Correction box opens, input the following:
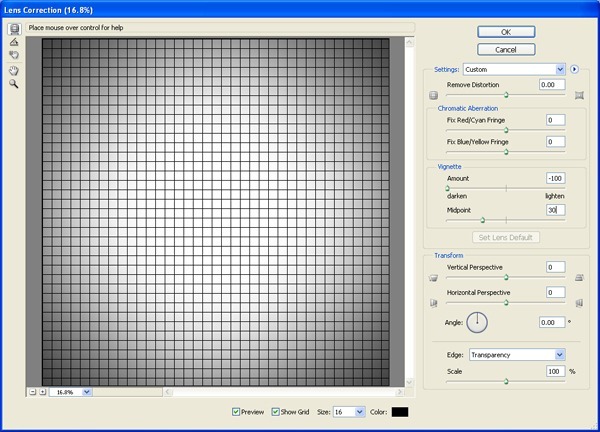
The result should be similar to this:

Step 64
Now change the layer mode to “Multiply” and the opacity to 100%:
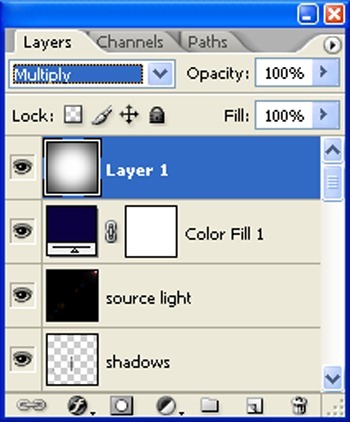
The result should be similar to this:
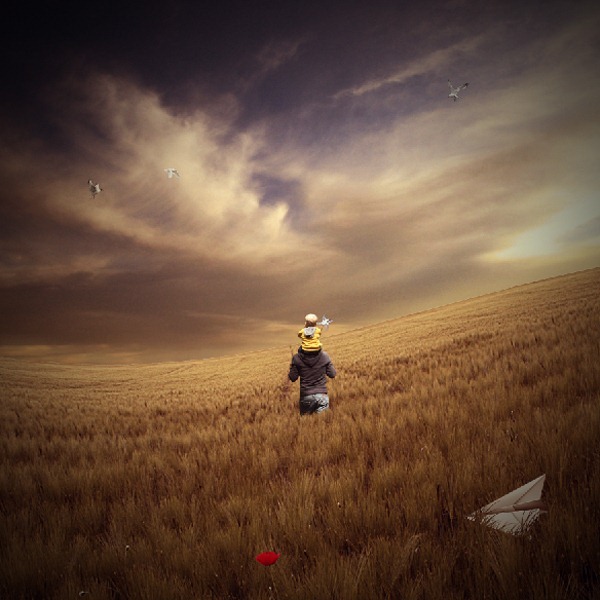
Step 65
Now make a duplicate (Ctrl+j) of “Vignette 1″ layer and change the layer mode to “Multiply” and the opacity to 25%:
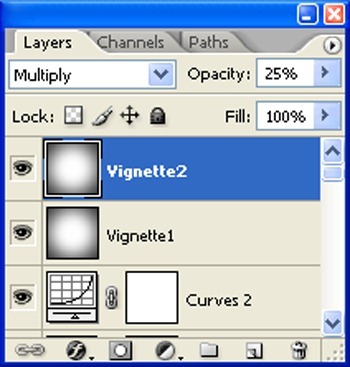
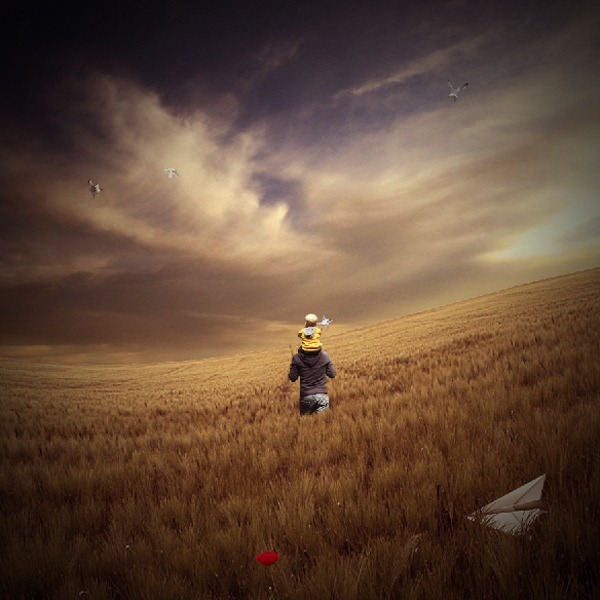
The result should be similar to this:
Step 66: Fix Lighthouse
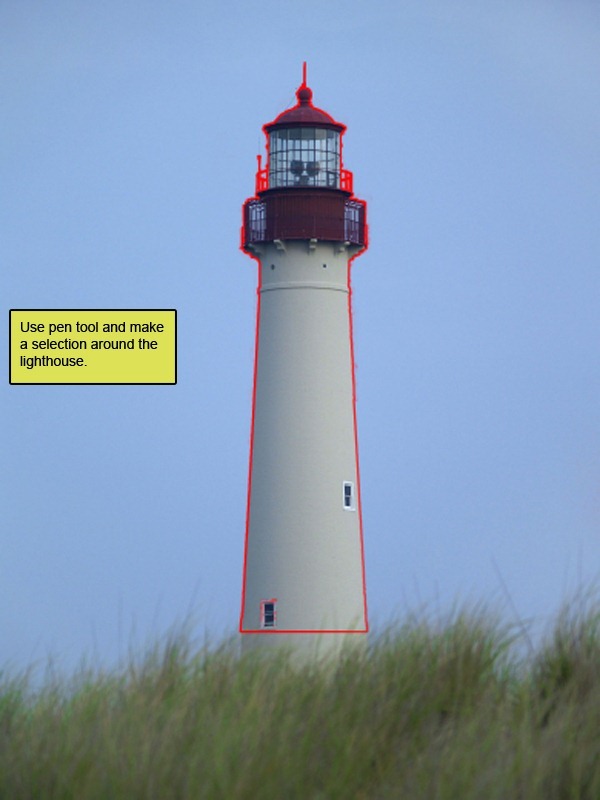
First off, let’s open the Cape May Lighthouse 8 stock in Photoshop. We will be using the Lighthouse from this stock image so we will need to transfer it to our main canvas.:
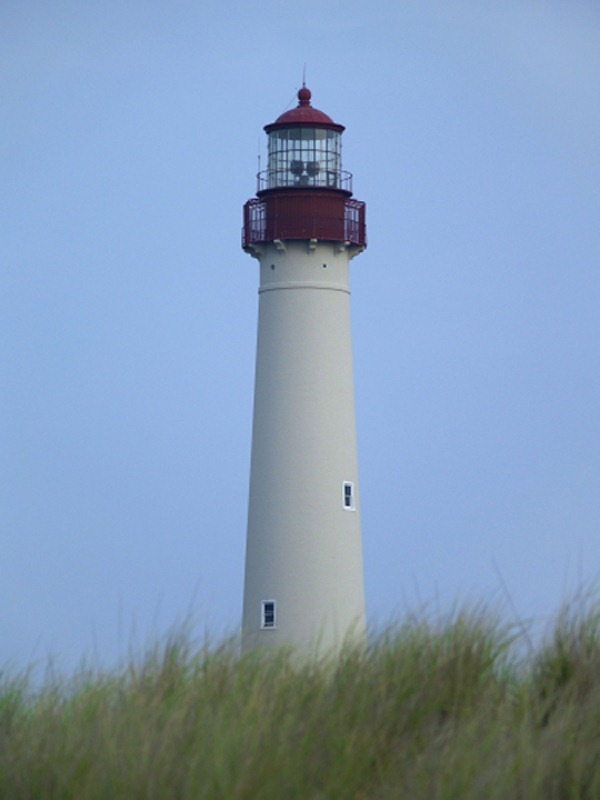
Step 67
Click the lighthouse and press P to activate pen tool and then make a selection around the balloons and then click V to activate the Move Tool. Left-click the image and drag the image to the main canvas and change layer name to “Lighthouse “:
The result should be similar to this:
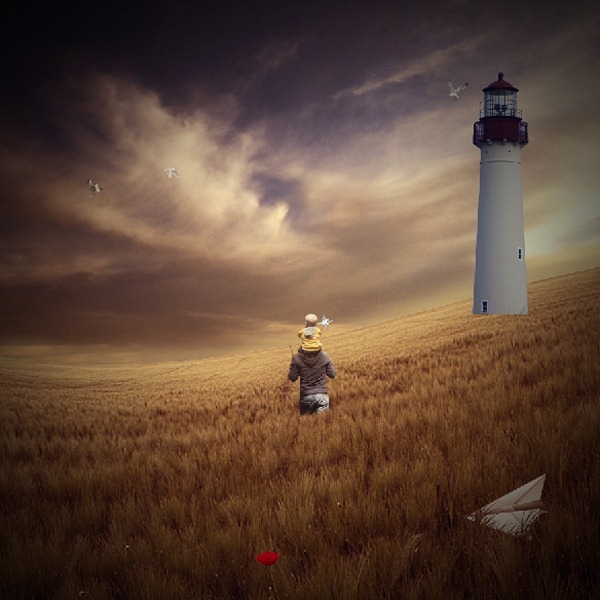
Step 68
Next, activate the Transform tool (Ctrl/Cmd +T), then while the “lighthouse” layer is selected and then resize it as shown below:
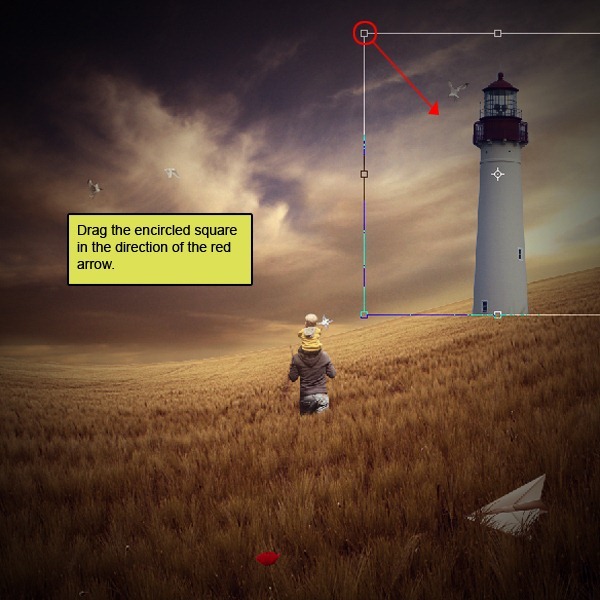
The result should be similar to this:

Step 69
Next, activate the Transform tool (Ctrl/Cmd +T), then while the “lighthouse” layer is selected and then resize it as shown below:
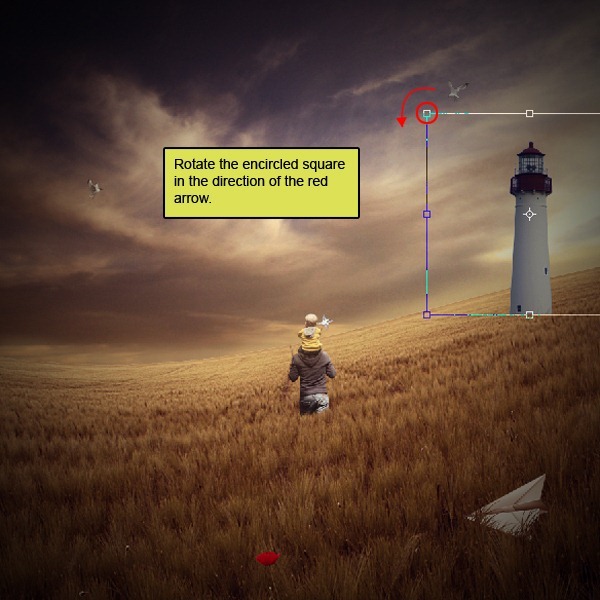
The result should be similar to this:

Step 70
Right click on the canvas while the Brush tool (B) is active and then pick this brush:

Activate Erase tool (E) with these settings:
- Brush size: 400px
- Hardness: 0%
- Opacity: 40%
- Flow: 100%
Now let’s erase :
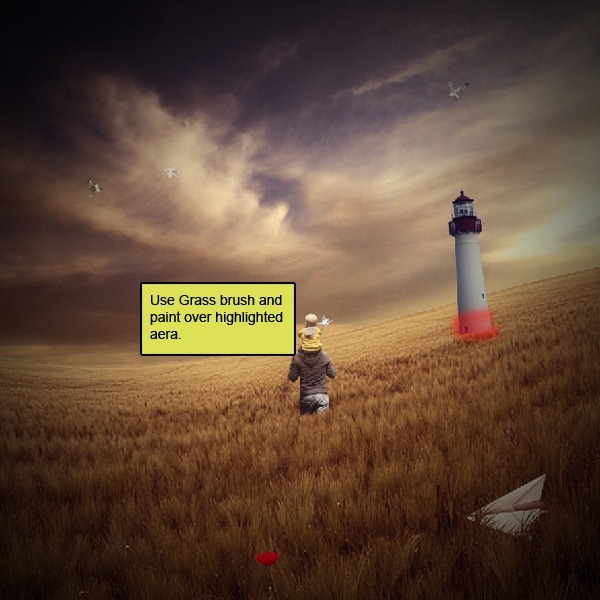
The result should be similar to this:

Step 71
Create a new Color Balance adjustment layer from the bottom of layers palette.
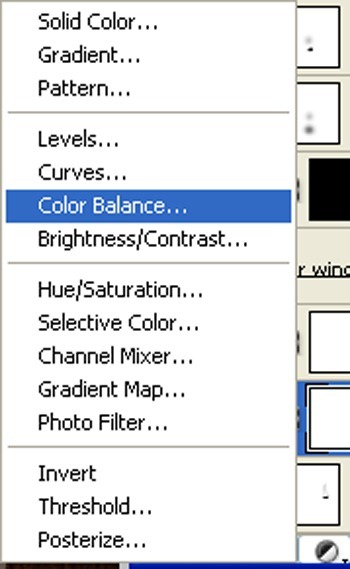
When the Color Balance box opens, input the following:

Step 72
Press Alt+left click in between 2 layer’s (Lighthouse layer and Color/Balance) to make a mask.
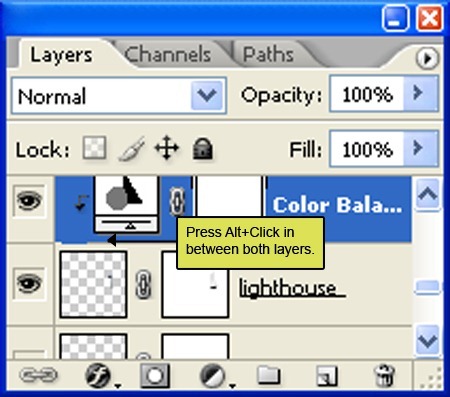
The result should be similar to this:
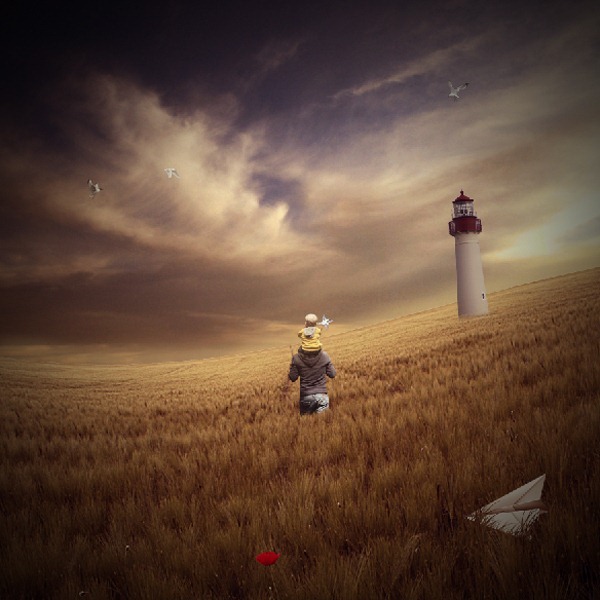
Step 73
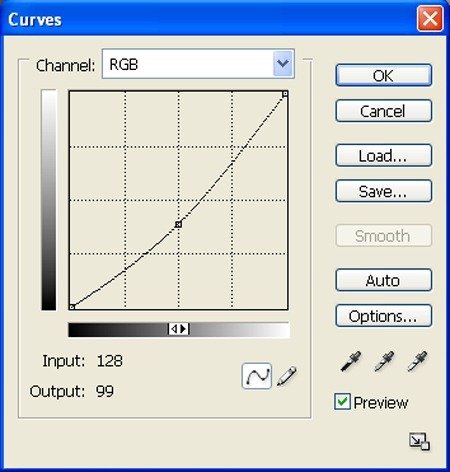
Create a new Curves adjustment layer from the bottom of layers palette .Press Alt+left click in between 2 layer’s (Light house layer and Curves) to make a mask.
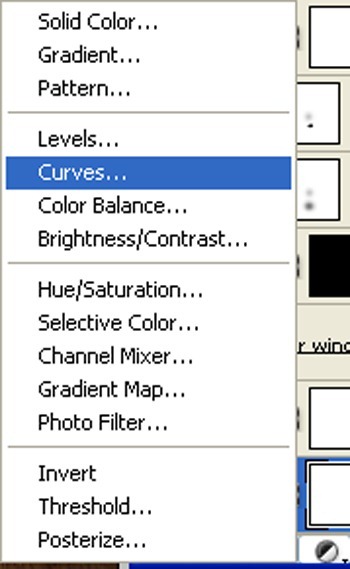
When the Curves box opens, input the following:
The result should be similar to this:

Step 74
Now let’s make a shadow. Activate a layer and name it shadow. Activate the brush tool (B) then right click on the canvas while the Brush tool (B) is active and then pick this brush:
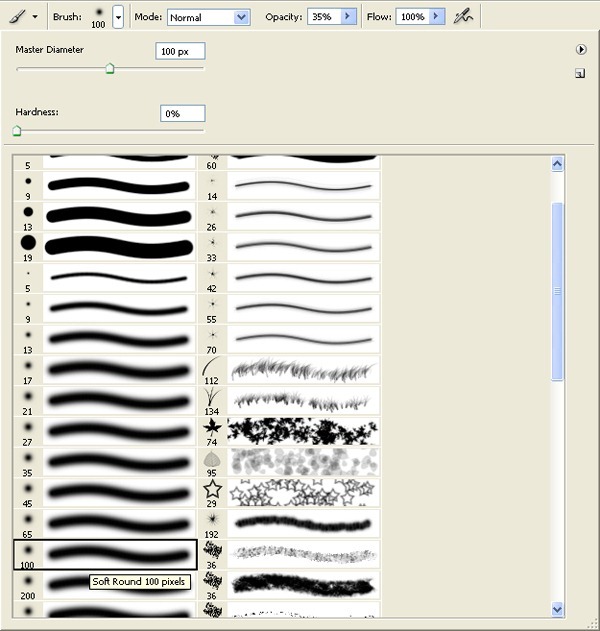
Activate Brush tool (B) with these settings:
- Brush size: 400px
- Hardness: 0%
- Opacity: 40%
- Color:#000000
- Flow: 100%
Now let’s erase.
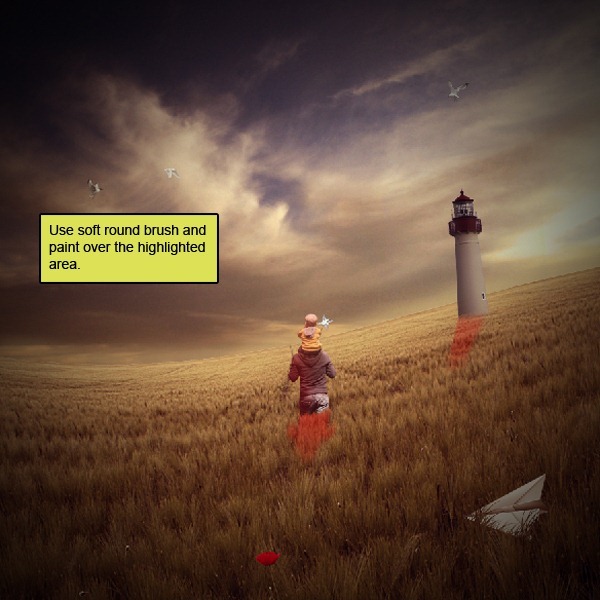
The result should be similar to this:

Step 75: Add texture
Open the soft bokeh texture in Photoshop. We will be using the texture from this stock image so we will need to transfer it to our main canvas.

Step 76
Click the Bokeh Texture and press V to activate the Move Tool. Left-click the image and drag the image to the main canvas and change layer name to “Texture”. The result should be similar to this:
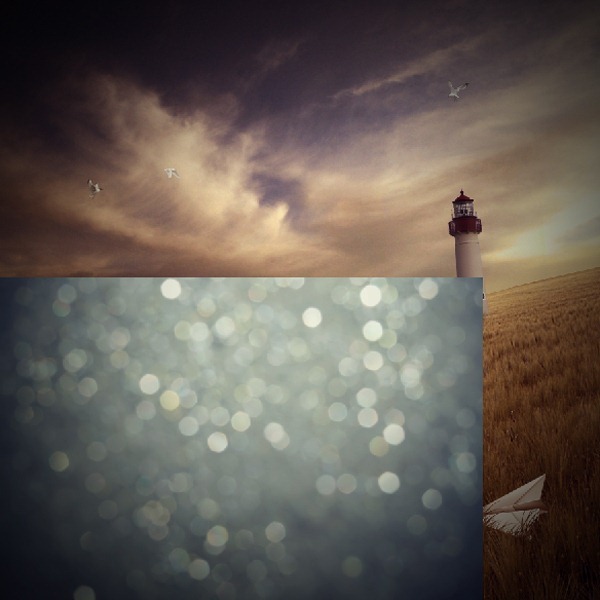
Step 77
Next, activate the Transform tool (Ctrl/Cmd +T), then while the “texture” layer is selected and then resize it as shown below:
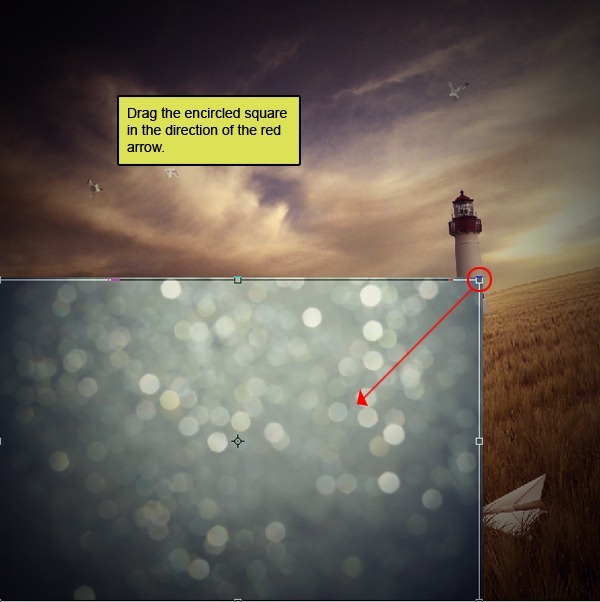
Step 78
Make 3 duplicates (Ctrl/Cmd+J) of the texture layer and arange them see as below :
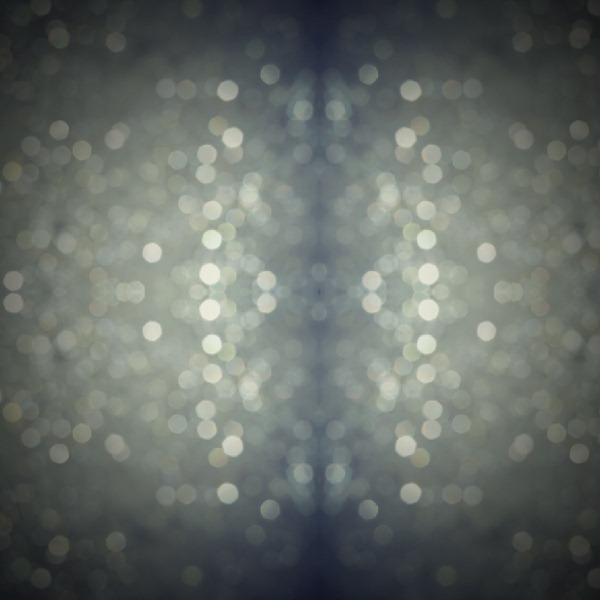
Step 79
Select all layers and marge (Ctrl+e) them and name it “texture” :
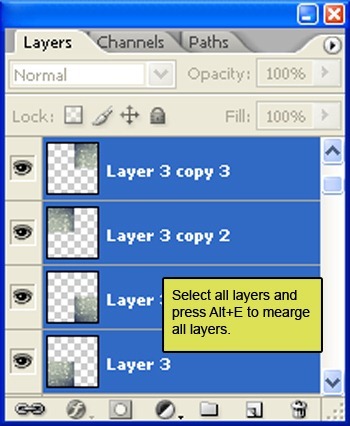
change the layer mode to “soft light” :
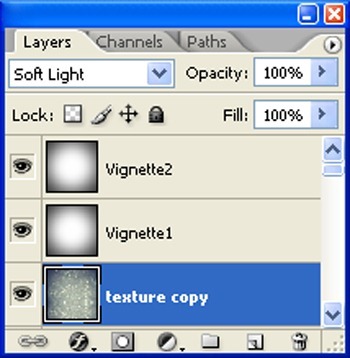
The result should be similar to this:

Step 80
Activate the Eraser tool
- Brush size: 2000px
- Hardness: 0%
- Opacity: 40%
- Flow: 100%
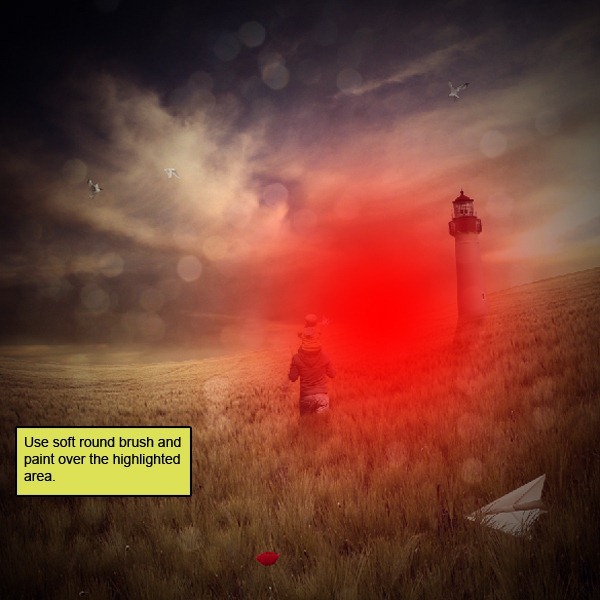
The result should be similar to this:

Final Results
![final-results[1] final-results[1]](http://photoshoptutorials.ws/images/stories/90c1e7cbba8f_E439/final-results1.jpg)
Finally
No comments:
Post a Comment