Monday, February 24, 2014

Beer

Design Beer Glass and Bottle
Well, in this easy Photoshop tutorial I’m going to be teaching you how to design beer glass and bottle.

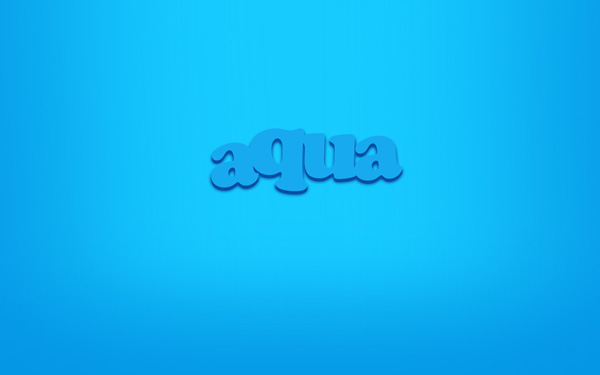
First create a new document with size of 1000×1200 then add in the background that you want. I used linear gradient with colors of #102254 and #0e79c4.
I went to Google Images, looked up a good picture of glass and bottle then cut it out of the photo and brought to our canvas, you can feel free to download this picture from here.
Then we need to color bright parts of glass into the blue color. Go to layer with glass and applySelect > Load Selection to select it then go to Layer > New > Layer to create new layer and useBrush Tool to draw some areas with color of #021851. Merge two of these layers.
Set up layer mode to Color.
Ok, time to put label to our items. I went to Google Images again and find proper pictures. I prefer to use this one for covering bottle and the second one for covering glass. Cut it out of the photo and brought to our canvas.
To bring realistic view to label on the glass use Transform > Warp to get the picture like this:
It’s time to add water drops to labels. Go back to Google Images and find water drop texture. I prefer to use this one. Bring it to the canvas then press Ctrl+Shift+U to desaturate texture. Then turn and reduce it twice as shown on the picture below. After this actions press Ctrl+J two of times to get two more copies of texture for each of three labels. Then select one of the labels, go to the layer with texture, press Ctrl+Shift+I to invert selections and delete selected texture. After that, deselect your image. Make the same thing for all of labels. Now you’ve got the picture like this:
Change layer mode to Overlay for all of three textures.
We can add shadows on the sides to make pictures of labels voluminous on the bottle. Go to the one of layers with label and apply Select > Load Selection then create new layer and fill the selection with Black to Transparent gradient from the one and opposite sides. The same things do with the second label.
Ok, the last one thing what we need to do with image of bottle to add image add a feeling of presence back label. Make a new selection with the Rectangular Marquee Tool then create a new layer and fill it with a black color:
Press Ctrl+D to deselect object and apply Edit > Transform > Warp:
Then mess with the layer mode & opacity/fill. I tried Multiply with opacity of 50%.
Looks cool! Now comes the important part, we need to make reflection for glass and bottle. For creating this effect duplicate layer with bottle and label, then merge it and duplicate layer with glass. Now use Edit > Transform > Flip Vertical to flip vertical two of our layers and move it down to get the picture below:
Then apply Edit > Transform > Warp for two of layers to get transformation similar to these:
Merge these layers and apply Quick Mask Mode with gradient as below:
Then go back to Standard Mode. Now we have some selected area.
Press Del to clear image into the area, deselect it with Ctrl+D and set up layer opacity of 50%. Ok, now time to add flare to the surface, where is the objects standing. For this effect select Polygonal Lasso Tool and make selection as on picture below then create a new layer and fill it with a white color.
Deselect this area and apply Filter > Blur > Gaussian Blur with presets like this:
Now apply Filter > Blur > Motion Blur with the next presets:
Change layer mode to Overlay for this layer.
Ok, now we need to add a little bit shadows to surface. Use again Polygonal Lasso Tool and make selection as on picture below then create a new layer and fill it with a black color.
Deselect image and apply Filter > Blur > Gaussian Blur with similar settings to these:
Then apply Filter > Blur > Motion Blur with the next presets:
So, now you’ve got something interesting like that:
That’s it. Our tutorial is done. Enjoy it!

Photoshopping Aqua Wallpaper

Final Image Preview

Create the famous Aqua wallpaper in just a few minutes using Adobe Photoshop CS3
Create a new file (File>New) of 1920x1200px/72 dpi.
In this case we’ll select the Paint Bucket Tool (G) and fill our primary layer with blue color. The color’s code is#17CBFF
Create the famous Aqua wallpaper in just a few minutes using Adobe Photoshop CS3
Select now the Brush Tool (B) with the next demonstrated parameters. Opacity 30% and the color’s code is#0499E6
Create the famous Aqua wallpaper in just a few minutes using Adobe Photoshop CS3
Paint the blue background on its lateral sides.
Create the famous Aqua wallpaper in just a few minutes using Adobe Photoshop CS3
… and on the bottom part.
Create the famous Aqua wallpaper in just a few minutes using Adobe Photoshop CS3
Take the Horizontal Type Tool (T) and type the word ‘aqua’ by separate letters. All the letters have the same next demonstrated parameters, except Q.
Create the famous Aqua wallpaper in just a few minutes using Adobe Photoshop CS3
The parameters for the Q letter.
Create the famous Aqua wallpaper in just a few minutes using Adobe Photoshop CS3
Place the word the same way demonstrated below:
Create the famous Aqua wallpaper in just a few minutes using Adobe Photoshop CS3
Mark out the letters on the layers’ panel and press Shift button while left clicking on the appropriate layer. Then press Ctrl+J and the marked layers will be copied. Move them lower, using the Move Tool (V) and change their colors – #084DA2
Create the famous Aqua wallpaper in just a few minutes using Adobe Photoshop CS3
Select now Blending Options – Outer Glow for each letter. Make a double click on the necessary layer on the layers’ panel.
Create the famous Aqua wallpaper in just a few minutes using Adobe Photoshop CS3
It’s the result you should get:
Create the famous Aqua wallpaper in just a few minutes using Adobe Photoshop CS3
Now choose the next Blending Options – Inner Shadow for all the letters, except the last one.
Create the famous Aqua wallpaper in just a few minutes using Adobe Photoshop CS3
Blending Options – Outer Glow
Create the famous Aqua wallpaper in just a few minutes using Adobe Photoshop CS3
Blending Options – Inner Glow
Create the famous Aqua wallpaper in just a few minutes using Adobe Photoshop CS3
Blending Options – Gradient Overlay
Create the famous Aqua wallpaper in just a few minutes using Adobe Photoshop CS3
Gradient Editor
Create the famous Aqua wallpaper in just a few minutes using Adobe Photoshop CS3
The letters start to get a kind of marine nuance:
Create the famous Aqua wallpaper in just a few minutes using Adobe Photoshop CS3

Quick Tip: Create a Crisp Metallic Text Effect in Photoshop

In this quick tip tutorial, we will explain how to create a crisp, metallic text effect using just a couple of layer styles in Photoshop. Let's get started!

Tutorial Assets

The following assets were used during the production of this tutorial.

Step 1

Before opening Photoshop, install the font Rothenburg Decorative and these grunge brushes.
Open Photoshop and Create a New Document, 1800 x 1300 pixels in RGB mode, 72 DPI and finally then Fill the background with this dark grey color #1f1f1f.

Step 2

Create a New Layer, name it 'texture' and using these Grunge Brushes click a couple of times in the center of the document using a white color. Use different brushes, try to cover the center of the document, varying the textures.

Step 3

Double-click on the thumbnail of the Layer 'texture' to open the Layer Style panel. Into the 'Blending Options'
Reduce the 'Fill' to 0, then apply a 'Drop Shadow' and an 'Inner Shadow' using these settings. This will give the texture a realistic embossed look.

Step 4

Click on the 'Add Layer Mask' icon, then click Command/Ctrl + (I) to invert it.
Pick a big soft Brush (hardness: 0% - size: 950px) and click in the center of the document. This way the 'texture' Layer will be shown only in the center, fading on the edges of the document.

Step 5

Using the 'Type Tool' (T) and these settings, type the word 'Othello' or whatever you want. If you can't see the 'Character Window" go to Window > Character.

Step 6

Open the 'Layer Style' of the 'Othello' Text Layer and apply these settings. Below each step you can find a preview for the effect just added.

Step 7

Once you've modified the Style, click Ok. Now select the word 'Othello', using the Type Tool (T). Select everything beside the first capital letter and reduce the kerning to -5 as in the image below. You can find the Character Window under Window > Character.

Step 8

Duplicate this Layer with Command/Ctrl + (J), right-click on the Layer's thumbnail and choose 'Clear Layer Style'. This way the text below matches exactly the one above, and now we can add more effects. My favorite way to work with 2 Layer Styles, is to create a solid base as we did to the first Text Layer, and then add lightings and reflections on the second Layer above. This way you can blend easier the lights and colors with the textures of the Layer below.

Step 9

Let's go on, adding a Layer Style to this second 'Othello' Text Layer. Double click on its thumbnail to open the Layer Style panel. Set fill opacity to 0 in blending options.
Advertisement

Step 10

The effect is pretty much done, but we need to make it look crisp and realistic, in this final step. Take a look at the trick with the 'Stroke': dropping down it's Opacity to '0' it works almost as a layer mask, hiding the Layer on its edges. A Stroke of 3px 'Inside', for example, will hide the Text for 3 px along the edges, revealing what's below in that 3px range. Once you've finished with these settings, click Ok to apply the effect.

Conclusion

Remember that when you Save the final effect, as a jpg image for example, it may look different, sharper, and more defined overall.
Related Posts